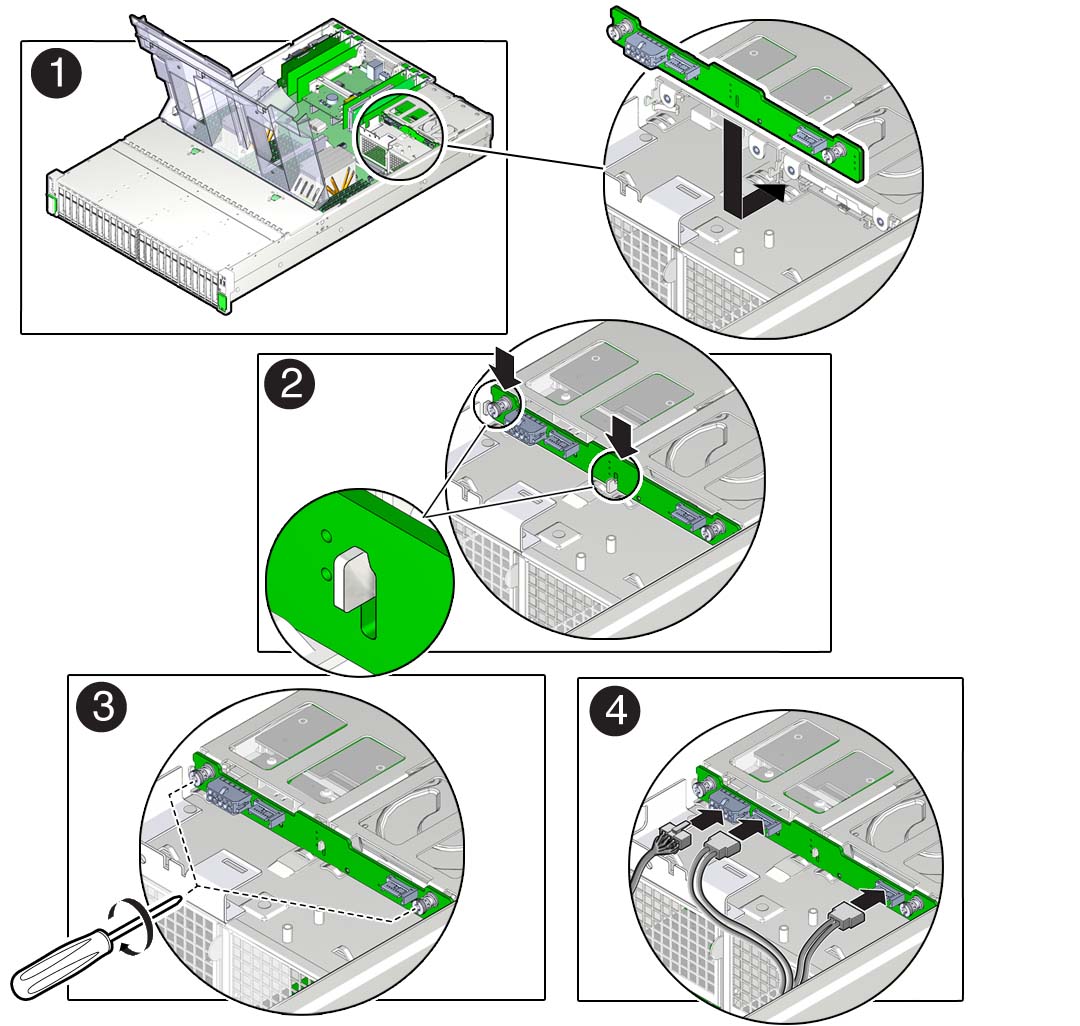
Install the Storage Drive Backplane for Rear-Mounted Storage Drives
-
Lower the storage drive backplane into the server, and position it to
engage the two standoff hooks [1 and 2].

- Using a No. 2 Phillips screwdriver, install and tighten the two screws to secure the storage drive backplane to the storage drive cage [3].
-
Reconnect the cables to the storage drive backplane [4].
- Reconnect the power cable to the storage drive backplane.
-
Reconnect the two SAS cables to the storage drive
backplane.
To ensure proper SAS cable connections, see Install SAS Storage Drive Cables.
-
Return the server to operation.
- Lower the air baffle to the installed position.
- Install the server top cover.
- Install all storage drives into the storage drive cage.
- Return the server to the normal rack position.
-
Reconnect the power cords to the power supplies, and power on the
server.
See Reconnect Power and Data Cables and Power On the Server. Verify that the power supply AC OK LED is lit.