Remove the Switch
Removing the switch is a cold-service operation. You must power off the switch before you remove it.
Note - Because of the weight and mounting of the switch, two people are required for switch removal.
-
Consider your first step.
- If you have not prepared for service, you must do so now.
- If you have completed those prerequisite tasks, go to Step 2.
- Remove the air duct assembly and SER MGT cable (if connected).
- Remove both snap brackets.
- Power off both power supplies.
-
Remove all data cables.
See Remove a Data Cable.
-
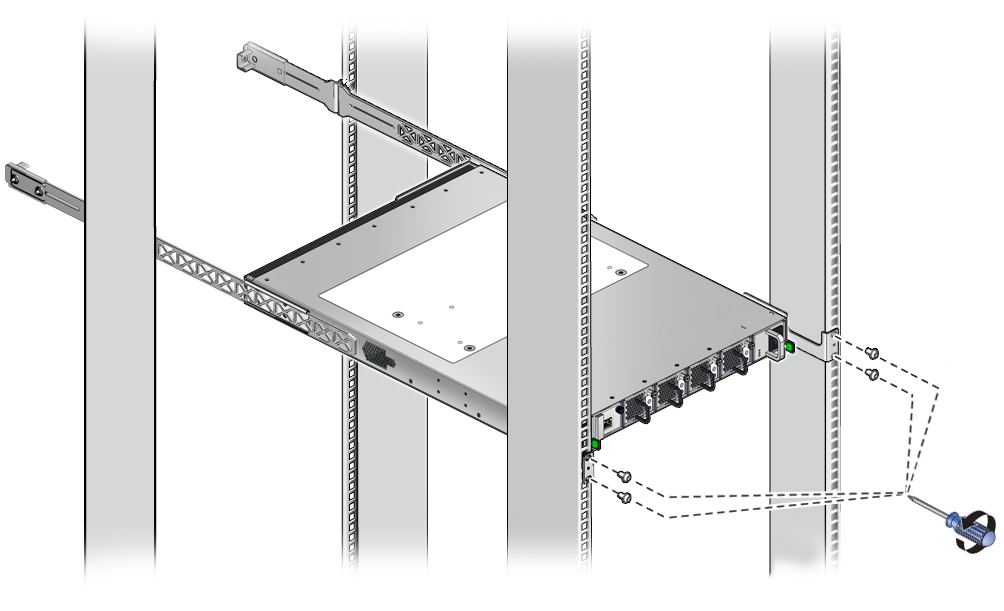
While supporting the weight of the switch, use a No. 2 Phillips screwdriver to
remove the four screws from the long brackets.

-
Gently slide the switch out of the rack.
Ensure that the switch does not bind on the long rails as it slides.

- Set the switch down onto a stable work surface.
-
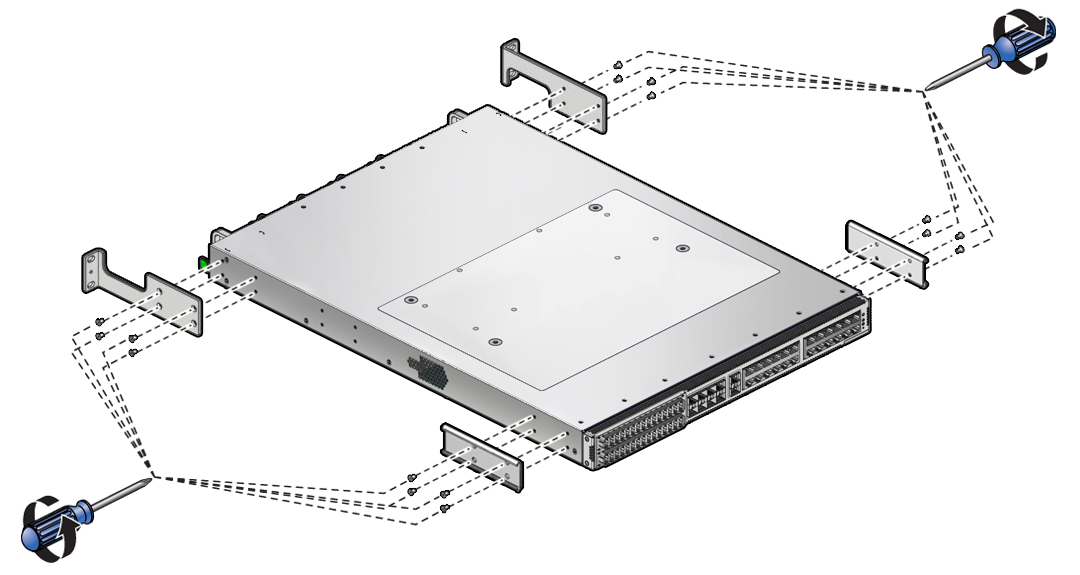
Use a No. 1 Phillips screwdriver to remove the eight screws that secure the
C-shaped brackets at the rear sides of the switch chassis.

- Remove the eight screws that secure the long front mounting brackets at the front sides of the switch chassis.
-
Install the replacement switch.
See Install the Switch.