Install the Switch
Note - Because of the weight and mounting of the switch, two people are required for switch installation.
-
If you are replacing the switch, remove the faulty or obsolete switch first,
then return to Step 2 of this task.
See Remove the Switch.
-
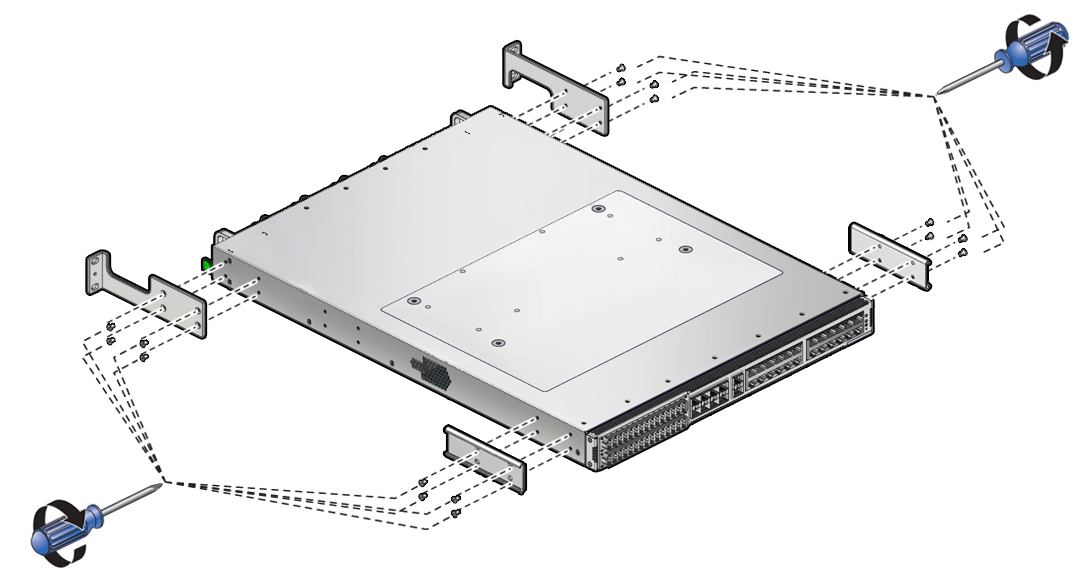
Use a No. 1 Phillips screwdriver to install the eight screws that secure the
two long front mounting brackets to the front sides of the chassis.

- Use the eight screws to attach the two C-shaped brackets to the rear sides of the chassis.
-
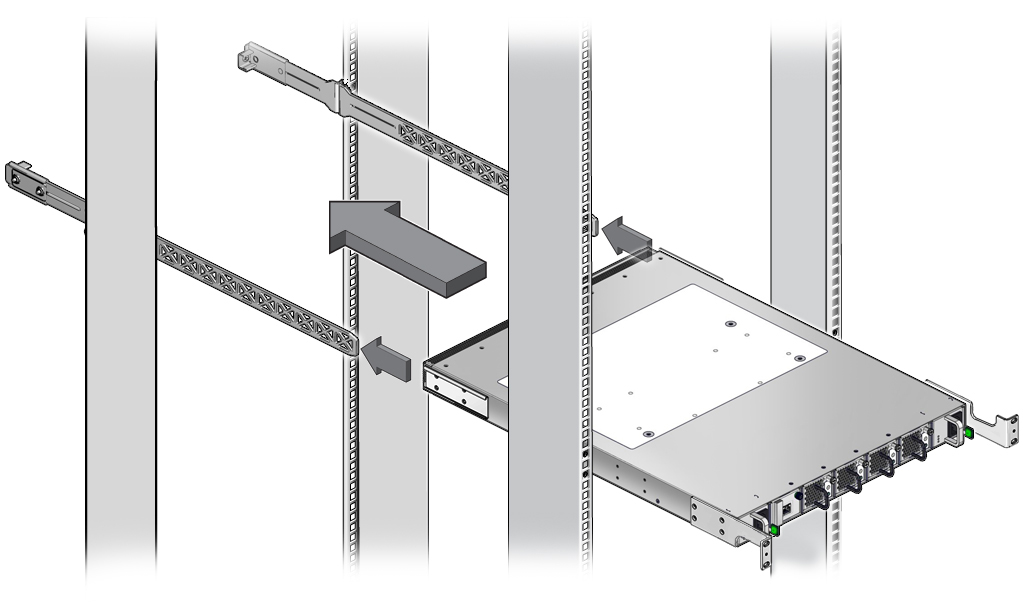
Carefully lift the switch and slide it into the rack, from the front
rearward.
Ensure that the ends of the long rails slide into the C-shaped brackets at the rear of the switch chassis.

-
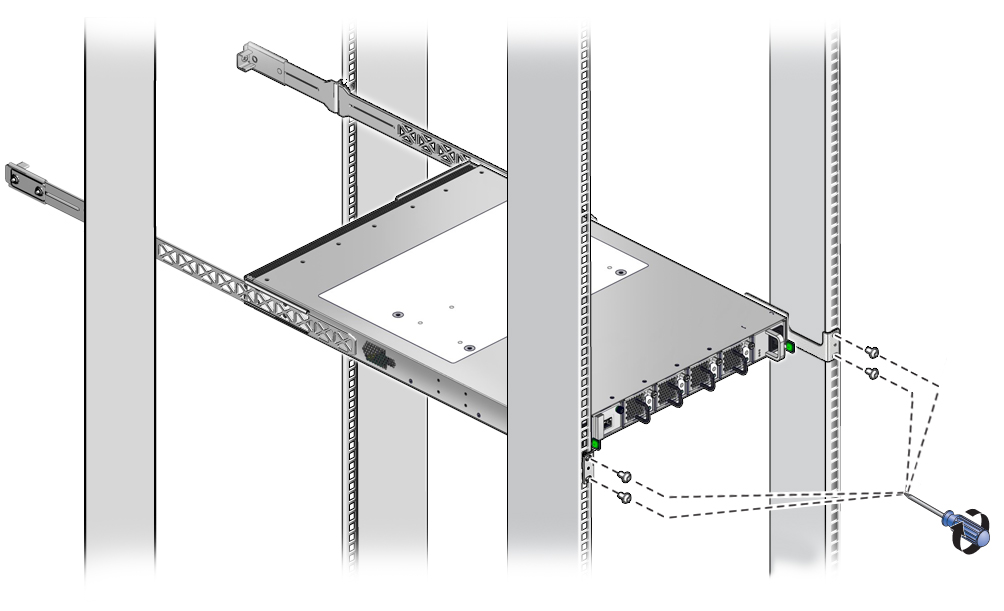
Use a No. 2 Phillips screwdriver to mount the front of the switch chassis to
the front rack posts with two screws at each side.

Note - Do not fully tighten the screws at this time. -
Return the switch to operation.
Perform the tasks as directed in Returning the Switch to Operation, the first of which is to retrieve the power cords. See Retrieve the Power Cords and SER MGT Cable.