Create a DB VM Group Profile (BUI)
Perform this procedure to create a DB VM group profile.
The DB VM group provides the foundation for the DB VMs and DB instances. Before you can create DB VMs, you must create a DB VM group. One DB VM group is supported on the system. If a DB VM group profile already exists, you cannot create another one.
Note - It is possible that the DB VM group profile was created when the system was initially set up. To determine if a group profile has already been created, see View the DB VM Group and VMs (BUI).
Your system must be installed and initialized as described in the Oracle MiniCluster S7-2 Installation Guide. This ensures that the required packages that contain several necessary files, such as Oracle Solaris OS, Oracle Grid Infrastructure, and so on, are on the system.
- Access the MCMU BUI as a primary admin, such as mcinstall.
-
Ensure that the system has pool of IP addresses to apply to the DB VMs.
For each DB VM, you need 2 IP addresses. The SCAN requires 3 IP addresses.
When the system was installed, a pool of IP addresses was allocated to the system. To view, add, or change IP parameters, see:
View and Update Network Parameters in v1.2.4 and Later (BUI)
View and Update Network Parameters in v1.2.2 and Earlier (BUI)
-
In the navigation panel, select Database → Virtual Machine Group Profiles.
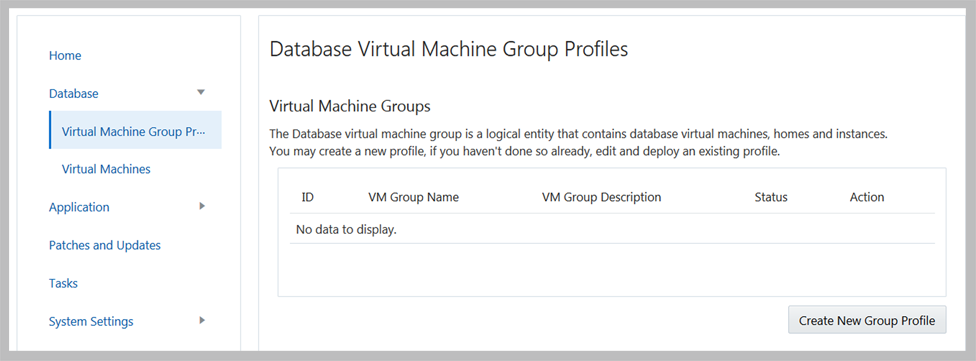
The Database Virtual Machine Group Profiles Summary page is displayed. This example indicates that a DB group has not yet been created.
-
Click Create New Group Profile.
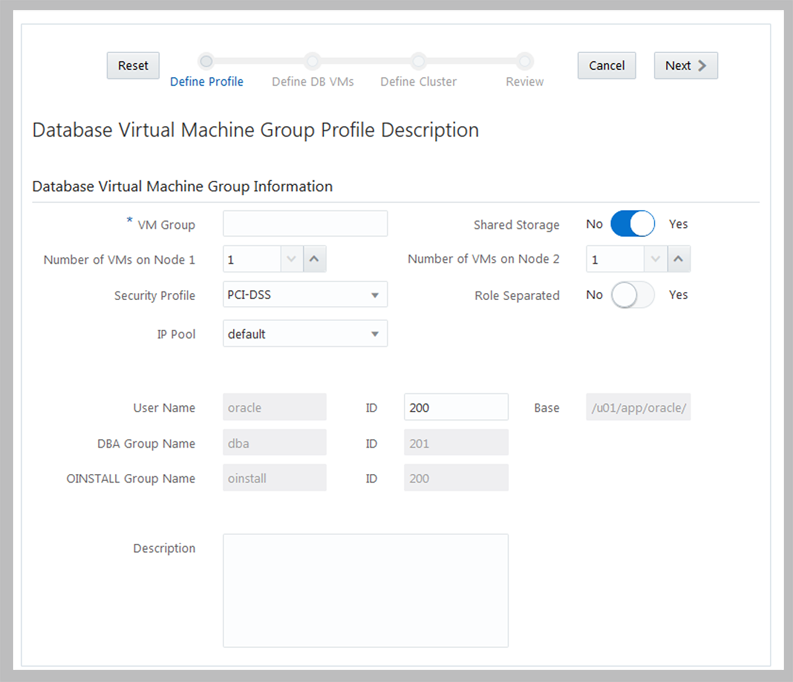
The Define Profile page is displayed.
-
In the Define DB VMs page, enter the required information, then
click Next.
For details about the required information, use the optional worksheet (DB VM Planning Worksheets (Optional)), or see DB VM Group Parameters.
Note - You do not have to have the same number of VMs on each compute node. However, if you plan to configure all the DB VMs in RAC pairs, assign the same number of VMs to the second compute node.This example shows the page when Role Separated is set to No.
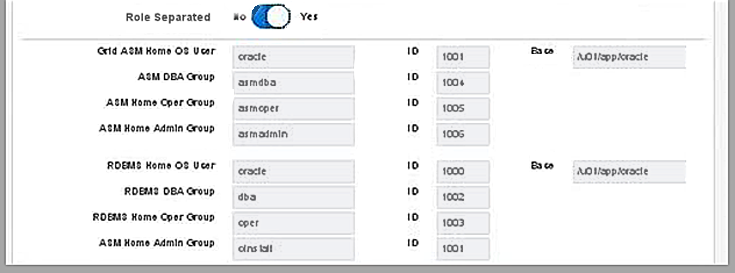
If Role Separated is set to Yes, the lower part of the page shows the users and roles that will be configured.
-
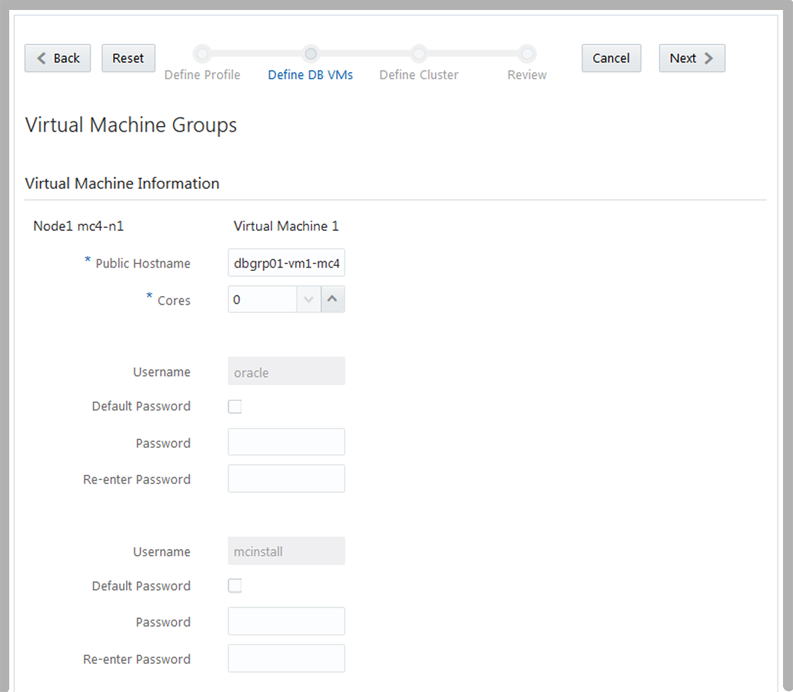
Complete the Define DB VMs page, then click Next.
For details about the required information, use the optional worksheet (DB VM Planning Worksheets (Optional)), or see DB VM Parameters.
-
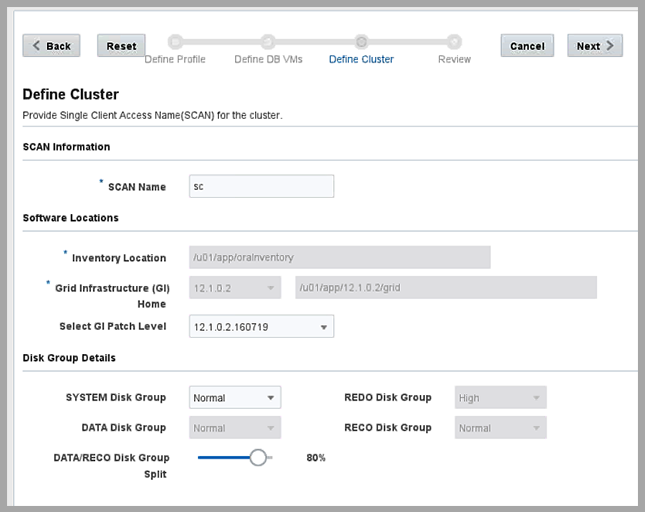
Complete the Define Cluster page, then click Next.
Many of the parameters on this page are automatically populated based on the information you provided in the earlier screens.
For details about the required information, use the optional worksheet (DB VM Planning Worksheets (Optional)), or see DB VM Parameters.
-
Verify that the information in the Review page is correct.
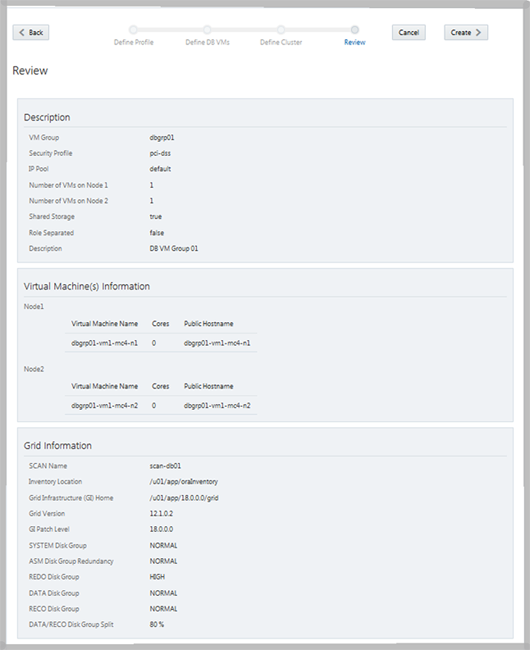
The Review page lists all the information that you filled in from the previous pages for this DB VM group. The information in this page is not editable.
- If you find any issues with any of the information on the Review page, click either Back to return to a previous screen, or click Cancel to return to the Home page.
- If you are satisfied with the information displayed on the Review page, click Create (or Generate). A progress window is displayed. Once complete, dismiss the window.
The utility begins assigning IP addresses to the VMs based on the IP address information that was entered during the initial installation of the system. This process can take 10 to 30 minutes to complete, depending on the number of DB VMs specified. When the process is finished, a screen is displayed that shows the IP mapping assignments.
-
Verify that the VM group profile is correct, and note the hostnames and IP
addresses for DNS.

Caution - Do not click Continue until you have recorded all the information shown in this Mapping IP review page.
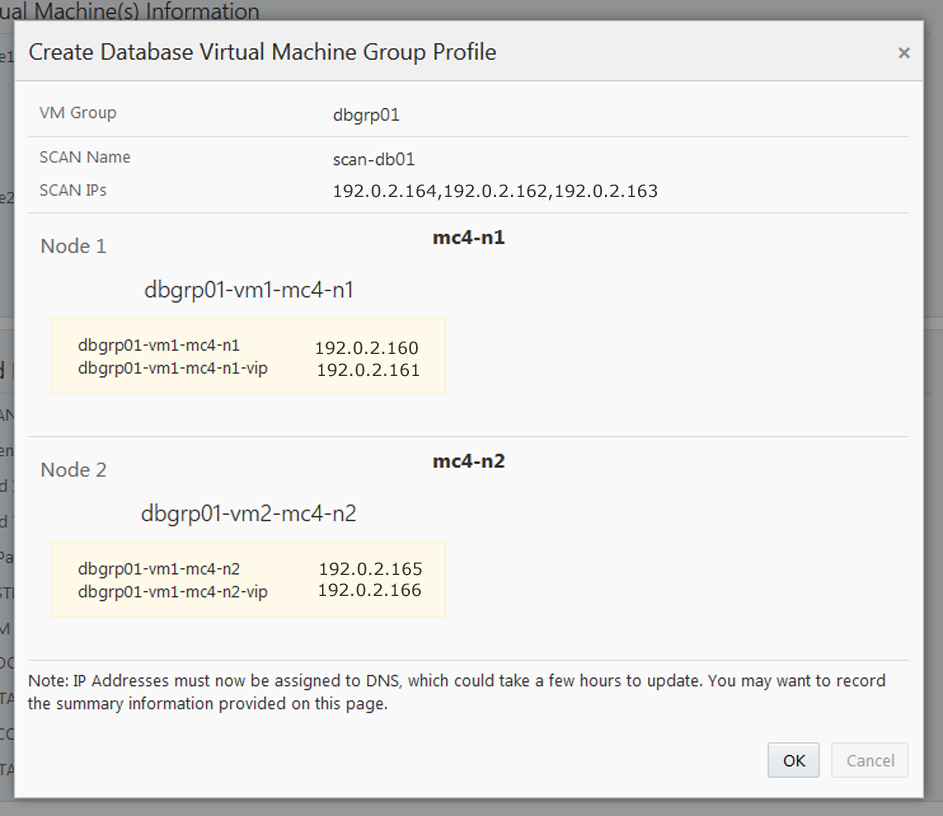
- If you find any issues with any of the information, close the window and repeat this task.
- If you are satisfied with the information displayed on the Mapping IP review page, record all the information shown in this screen so that you can enter the IP addresses and hostnames into DNS.
Once you have recorded all the information in the Mapping IP review page, click Confirm. The utility reserves the names and IP addresses for the DB VM group.
-
Enter all of the IP addresses and names into DNS.
As part of the next set of procedures, the utility verifies that the IP addresses and names for the VMs have been entered into DNS correctly, so you must have all of these IP addresses and names entered into DNS before proceeding.
-
When you have entered all the IP addresses and hostnames into DNS, click
Confirm.
The utility performs a set of configuration verifications. This takes approximately 15 minutes to complete.
- When the group profile process is complete, perform the next task.