View and Update Network Parameters in v1.2.2 and Earlier (BUI)
Use this procedure to view and update network parameters for MiniCluster systems running v1.2.2 and earlier.
Note - For MiniCluster systems running v1.2.4 or later, see View and Update Network Parameters in v1.2.4 and Later (BUI).
- Access the MCMU BUI.
-
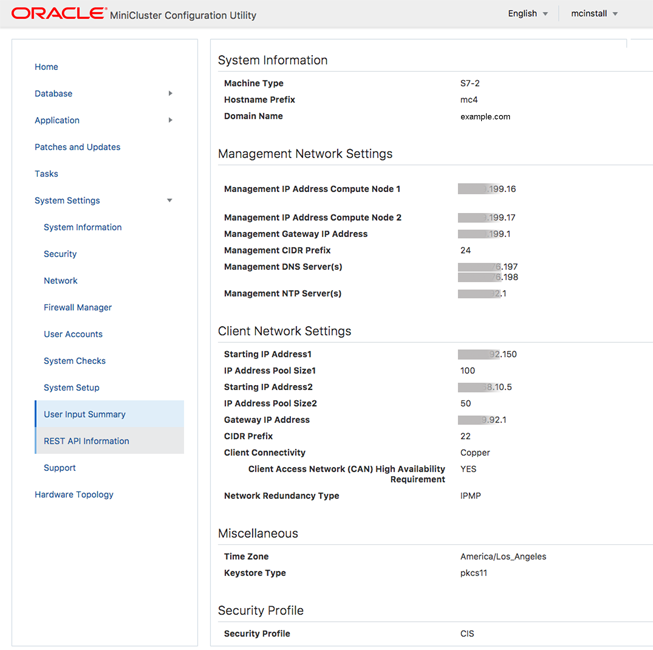
In the navigation panel, select System Settings → User Input
Summary.
This page shows hostname and network parameters that were configured during the initial installation. For example:

- (Optional)
Add additional IP addresses.
When the system was installed, groups of IP addresses were added to the system for the future creation of VMs. If those addresses have been consumed, and you need more addresses, perform these steps.
- Under Add IP Range, type the starting IP address and IP pool size.
- Click Add.
- (Optional)
Add or remove a DNS server.
-
Add a DNS server.
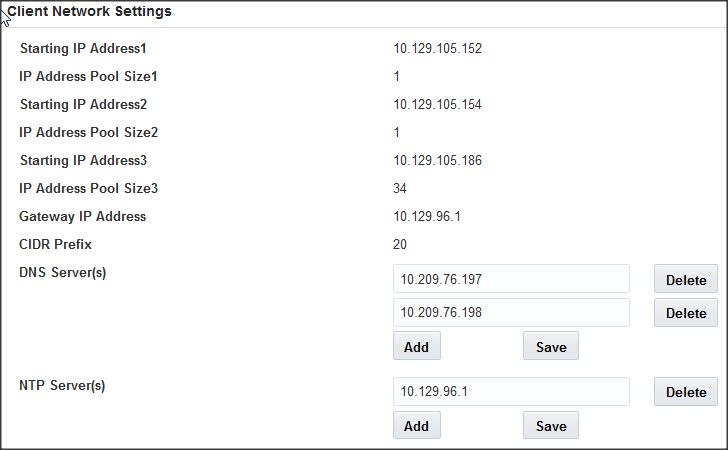
- Under Client Network Settings, click Add under the DNS Server entry.
- Type the IP address of a DNS server.
-
Click Save.

-
Remove a DNS Server.
When the system was installed, IP addresses of available DNS servers were added to the system. If you need to change or remove those IP addresses, perform these steps.
- Stop any queries to databases that are dependent on DNS. Consult with your Database Administrator on the best way to do this.
- Under Client Network Settings on the User Input Summary, click Delete next to the IP address.
-
Add a DNS server.
- (Optional)
Add or remove an NTP server.
-
Add an NTP server.
- Under Client Network Settings, click Add under the NTP Server entry.
- Type the IP address of an NTP server.
- Click Save.
-
Remove an NTP Server.
When the system was installed, IP addresses of available NTP servers were added to the system. If you need to change or remove those IP addresses, perform these steps.
- Stop any queries to databases that are dependent on NTP. Consult with your Database Administrator on the best way to do this.
- Under Client Network Settings on the User Input Summary, click Delete next to the IP address.
-
Add an NTP server.
-
To see the DB VM hostnames and IP addresses, perform these steps:
- Go to the Database → Virtual Machine Group Profiles page.
-
Click the Edit button.
The edit page lists the VM hostname (public hostname) and the associated public IP address for each database VM.
- At the bottom of the page, click Cancel.
-
To see the application VM hostnames and IP addresses, perform these
steps:
- Go to the Application → Virtual Machine Group Profiles page.
-
Click Edit for an application group.
The edit page lists the VM hostname (public hostname) and the associated public IP address for each VM.
- At the bottom of the page, click Cancel.