View and Update Network Parameters in v1.2.4 and Later (BUI)
Use this procedure to view and update network parameters for MiniCluster systems running v1.2.4 and later.
Note - For MiniCluster systems running v1.2.2 or earlier, see View and Update Network Parameters in v1.2.2 and Earlier (BUI).
When the system was installed, groups of IP addresses were added to the default IP pool for the future creation of VMs. If those addresses have been consumed, or you want to add additional IP pools on the same or different subnet, perform these actions:
-
View the IP parameters.
-
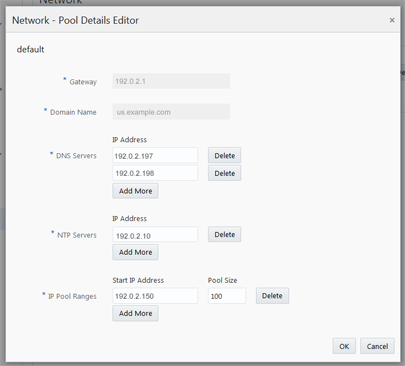
Edit IP parameters such as:
-
Gateway IP address
-
Domain name
-
DNS servers
-
NTP servers
-
IP pool IP address ranges
-
-
Add IP pools.
-
Delete an IP pool.
-
Assign a VLAN ID to an IP pool.
- Access the MCMU BUI.
-
In the navigation panel, select System Settings → Network.
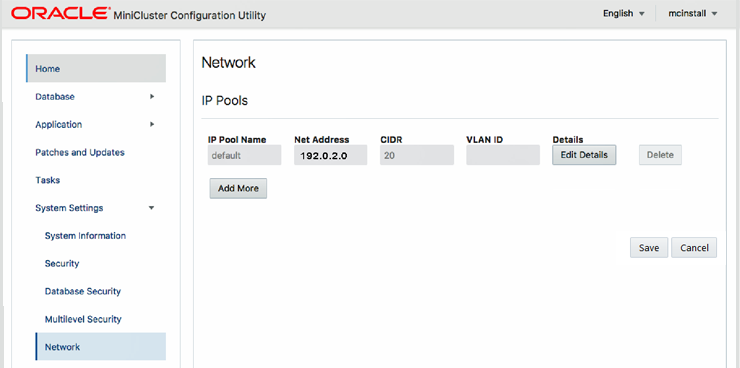
This page shows the IP pools that are configured in the system.
This example shows the default IP pool which was configured during the initialization of MiniCluster based on what was entered in the offline tool.

- (Optional)
Edit, add, delete IP pools, or assign VLAN IDs to IP pools:
Perform one or more of these actions:
-
Edit an IP pool:
-
For the IP pool you want to change, click Edit Details.
-
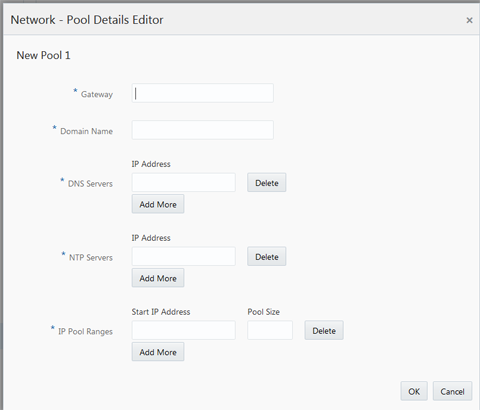
Enter the network parameters.
-
Click OK.
-
Click Save, then OK.

-
-
Add an IP pool:
-
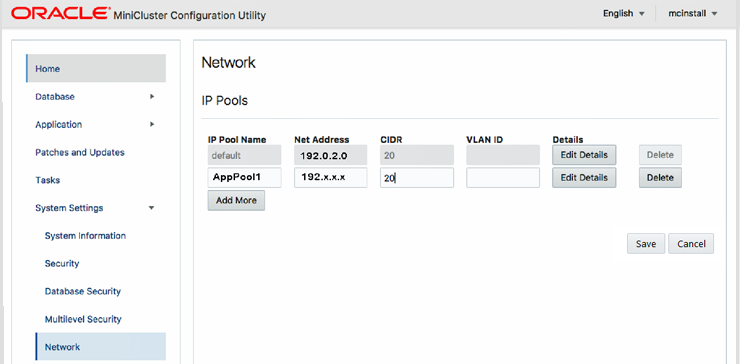
Click Add More.
-
Enter the IP pool name, net address, CIDR, and (optional) VLAN ID.
-
Click Edit Details and enter the network parameters.

-
Click OK.
-
Click Save, then OK.

-
-
Delete an IP pool:
-
For the IP pool you want to delete, click Delete.
-
Click Save, then OK.
If the Delete button is disabled, IP addresses in that pool are in use and the tool prevents you from deleting the IP pool.
-
-
Assign a VLAN ID to an IP pool:
-
Enter the VLAN ID in the VLAN ID field, and click Save.
-
-