Remove a Storage Drive
-
Prepare the server for hot service.
See Preparing the Server for Component Replacement.
Note - This procedure can also be completed as a warm service or cold service procedure. -
Identify the storage drive by its position and designation on the server
back panel.
Access this component directly from the back of the server. For storage drive position and designation information, see Storage Drive Locations and Numbering.
-
Identify the storage drive indicators on drive bracket front panel.
For example, look for the blue steady on Ready to Remove indicator or the amber steady on Fault-Service Required LED. See About Controls and Indicators.
-
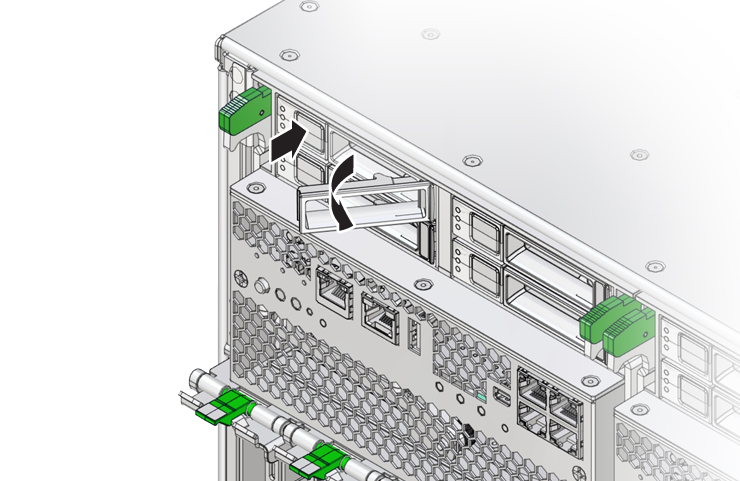
To unlock the storage drive handle, press the handle release button on the
front of the drive.
The spring-loaded handle pops open.

-
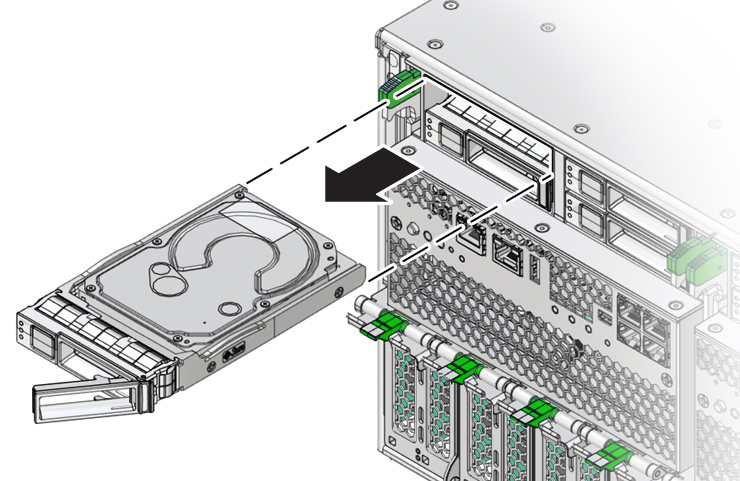
To remove the drive, rotate the handle to its fully open position and pull
the drive out of its slot.

Rotating the handle to its fully open position disengages the drive from its internal connector.
-
Consider your next steps:
-
If you are replacing the drive, continue to Install a Storage Drive.
-
If you are not replacing the drive, install a filler panel in the empty drive slot to maintain proper airflow. Perform administrative tasks to configure the server to operate without the drive.
For information on how to install a storage drive filler panel, see Component Filler Panels and Non-Powered Components.
-