Install an SMOD
Perform this procedure after servicing internal SMOD components, such as the HBA card, ESM, internal USB ports, or system battery.
For component serviceability, locations, and designations, see Replaceable Components.
-
Prepare the server for cold service.
This is a cold-service component. Power down the system and disconnect the AC power cables from the server before performing this procedure.
- If you are replacing the SMOD, transfer the RAID HBA, ESM, and USB flash drive (if present) to the new replacement SMOD.
-
Ensure that the handles on the SMOD are in their fully open
position.
- To unlock the SMOD handles, squeeze together the release latches on the end of both handles.
- To open, rotate both handles downward to their fully open position.
-
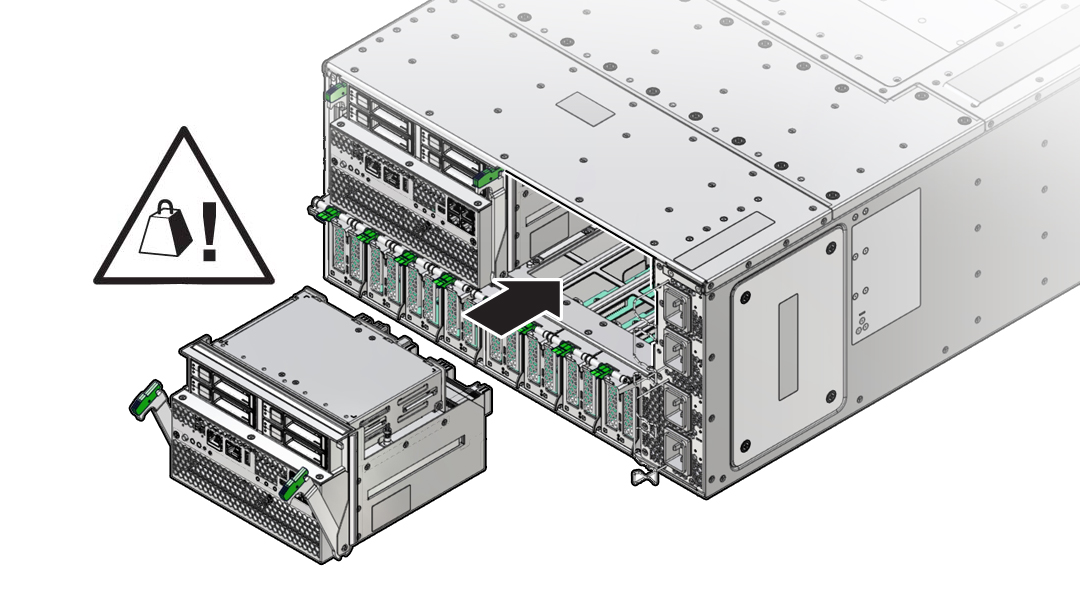
Orient the SMOD with the handles facing away from the server and the
connectors facing toward the open slot in the server.
Access the SMOD directly from the back of the server.


Caution - The SMOD is heavy. Hold it firmly until it is inserted into its slot.
- Align the SMOD in the slot.
-
Slide the SMOD into the slot until it stops.
This leaves the SMOD protruding slightly from the back of the server. Do not attempt push the SMOD in beyond this point.
-
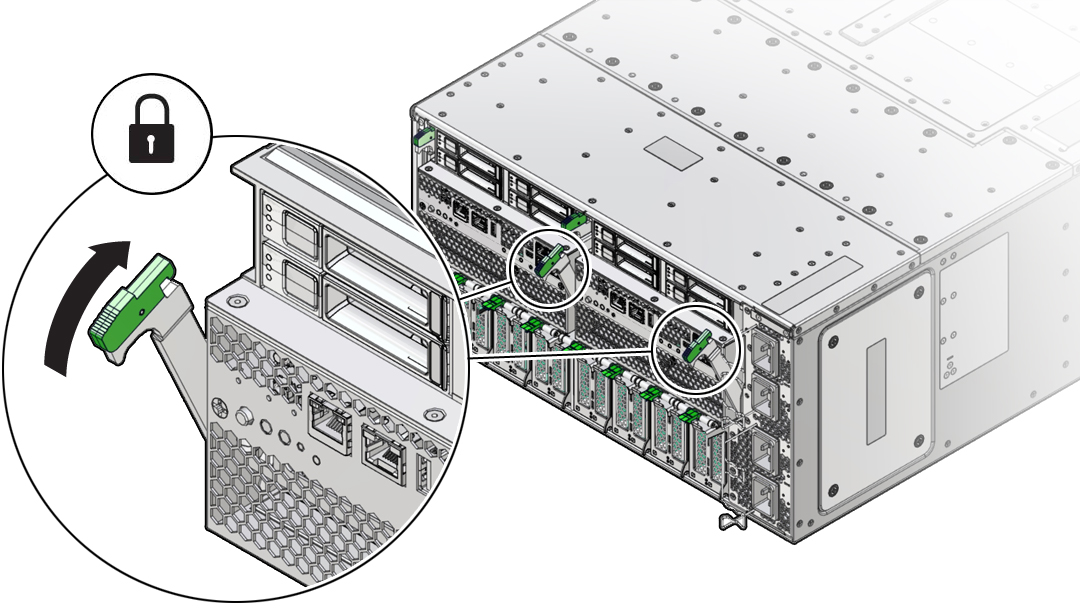
To install the SMOD, simultaneously rotate both handles up until they lock
into place.

Caution - Pinch point. When operating the lever, keep your fingers clear of the back side and hinged end of the lever.
This action draws the SMOD inward, engaging the SMOD connectors with the connectors on the server midplane.

- Connect the cables to the SMOD.
- Prepare the server for operation.