Install a Power Supply
Use this procedure when replacing a failed power supply or after having serviced the FIM.
-
Prepare the server for hot service.
See Preparing the Server for Component Replacement.
Note - This procedure can also be completed as a warm service or cold service procedure. -
Ensure that the AC power cord for the power supply slot is connected and
secured.
The power cord connects at the back of the server.
-
Open the power supply lever. Squeeze together the two release latches at
the end of the lever and rotate the lever to the left.
Access this component directly from the front of the server. Ensure that the power supply lever is in its fully open position.
-
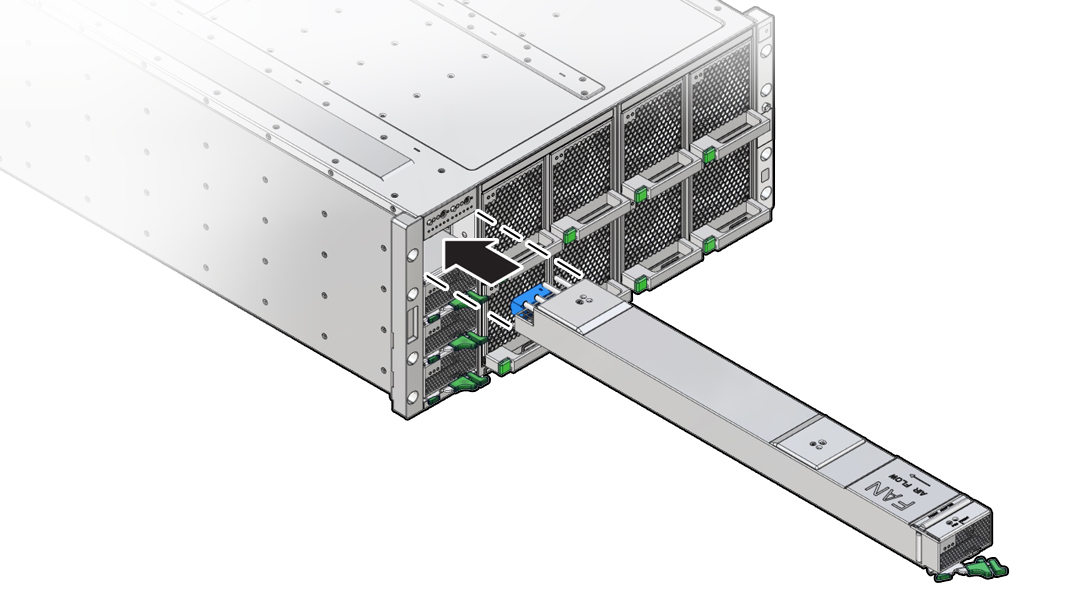
Align the power supply with its slot.
Ensure that the connector end of the PS is at the opening of the slot and that the open hinge on the front of the PS is at the bottom and to the left.
-
Slide the power supply into the slot until it stops.

-
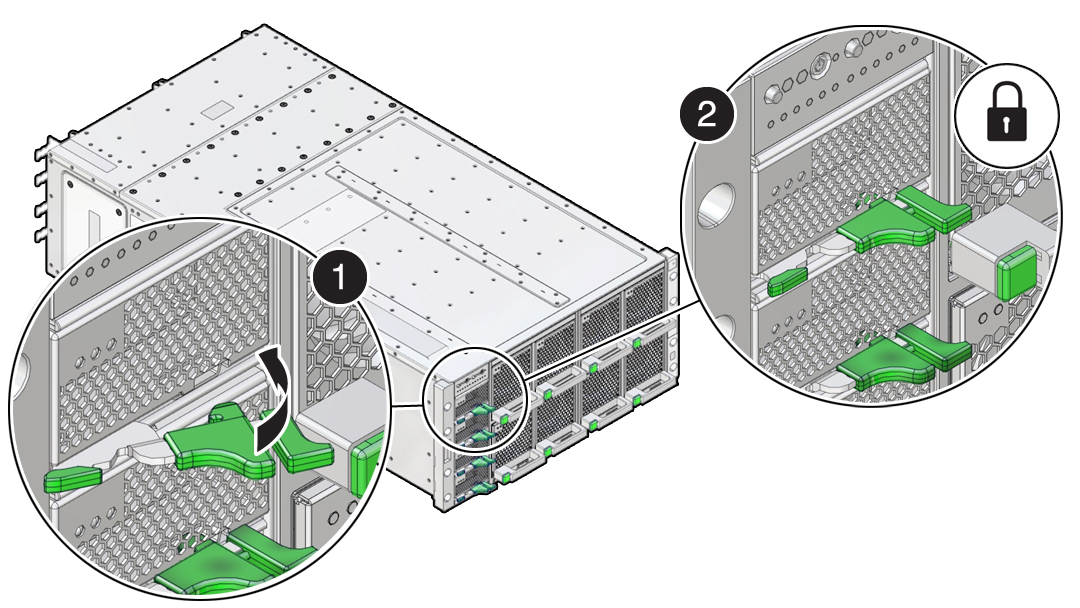
To install the power supply, rotate the lever to the right (1).
The pawl at the hinged end of the lever engages the sidewall of the server and provides the pivot point for the leverage necessary to draw the power supply into the slot and engage the internal connector. The two release latches at the end of the lever engage to secure the power supply in place (2).

Caution - Pinch point. Keep your fingers clear of the backside of the lever.

-
Verify that the green Power OK indicator on the power supply indicator
panel turns steady on and that the amber Fault-Service Required LED is not
lit.
The Fault-Service Required LED lights when the component is in a fault state.
- Prepare the server for operation.