Replace the Energy Storage Module
The Energy Storage Module (ESM) sits in a bracket on the top of the SMOD, between the two disk enclosures.
-
Prepare the server for cold service.
This is a cold-service component. Power down the system and disconnect the AC power cables from the server before performing this procedure.
-
Remove the SMOD.
See Remove an SMOD.
-
Turn the SMOD upside down on a flat surface with the back side facing
toward you.
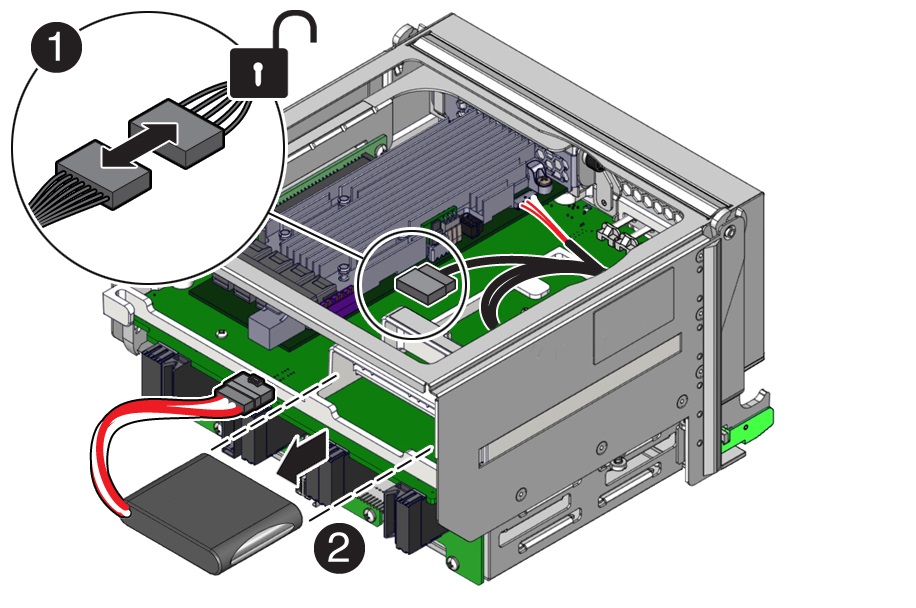
The ESM is located adjacent to the HBA card.
- Disconnect the ESM connector from the ESM extension cable [1].
-
Remove the ESM [2] by pulling it out of position.
The ESM is pushed to the back, through the cage and then pulled the rest of the way out of position.

-
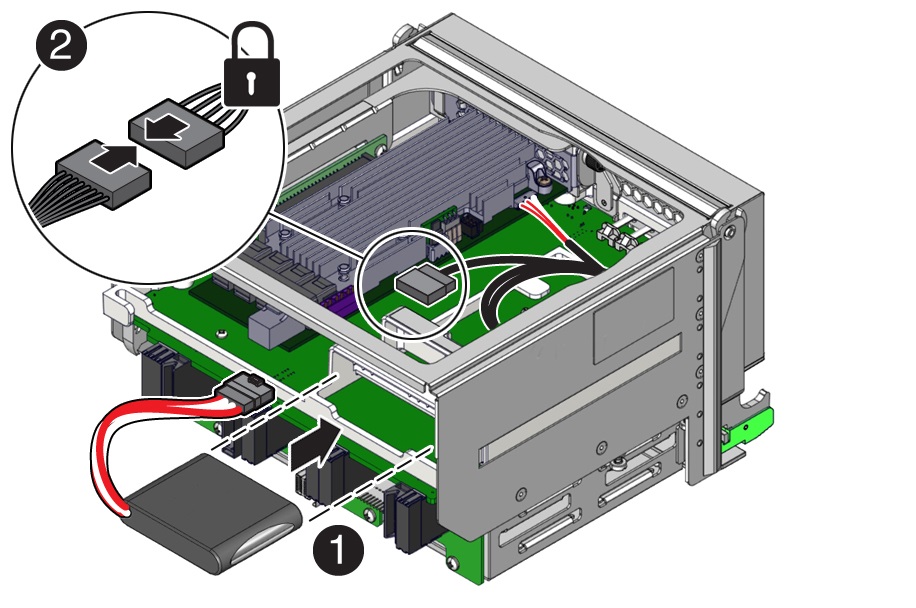
Insert the new ESM into the holder so that the cable extends out the
top [1].
Push it completely into position.
-
Attach the ESM connector to the ESM extension cable [2].

-
Install the SMOD.
See Install an SMOD.
- Prepare the server for operation.