Configure RAID With a Sun Storage 6 Gb SAS PCIe RAID Internal HBA
For systems with the Sun Storage 6 Gb SAS PCIe RAID Internal HBA, if you are not using a preinstalled OS from Oracle you must create a bootable volume on a drive before installing an OS. The system does not recognize a drive unless it has a volume on it created by the Sun Storage 6 Gb SAS PCIe RAID Internal HBA.
If there is more than a single volume on the drive that you intend to use as the boot drive, the volume that the OS will be installed on should be set as the boot device.
Before You Begin
You should have already selected a BIOS boot mode (UEFI or Legacy) from the BIOS Setup Utility.
Note - The BIOS boot mode used for the RAID configuration must match the mode that you will use when you install the operating system; otherwise, the RAID configuration will not be visible or usable.
Not all supported operating systems support UEFI mode. For a list of operating systems that support UEFI mode, see UEFI BIOS.
For instructions for switching the BIOS boot mode from UEFI to Legacy BIOS, or Legacy BIOS to UEFI, refer to the Oracle X4 Series Servers Administration Guide (http://www.oracle.com/goto/x86AdminDiag/docs).
-
Launch Oracle System Assistant.
See Setting Up Software and Firmware Using Oracle System Assistant.
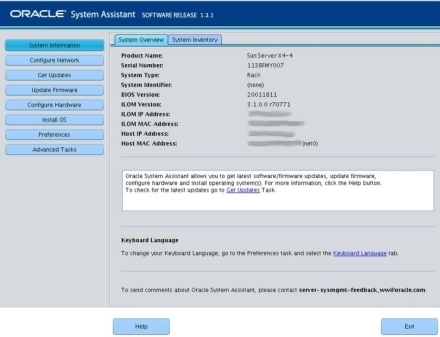
The Oracle System Assistant System Overview screen appears.
-
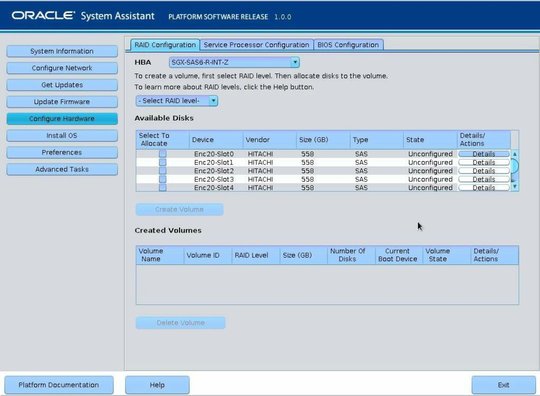
Click the Configure Hardware button, then select the RAID Configuration tab.
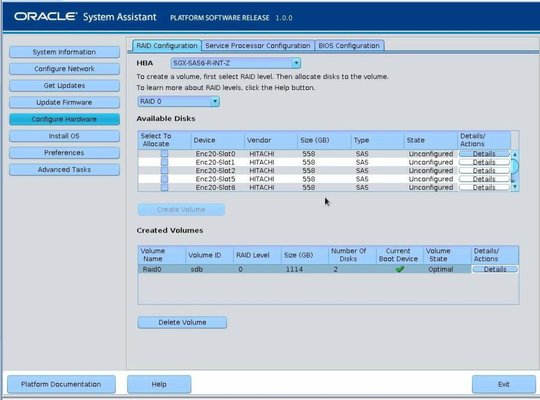
The RAID Configuration screen appears.
-
In the HBA list box, select the SGX-SAS6-R-INT-Z HBA.
This is the Sun Storage 6 Gb SAS PCIe RAID Internal HBA.
-
In the Select RAID Level list box, select the desired RAID level.
Oracle System Assistant supports RAID-0, RAID-1, and RAID-10.
-
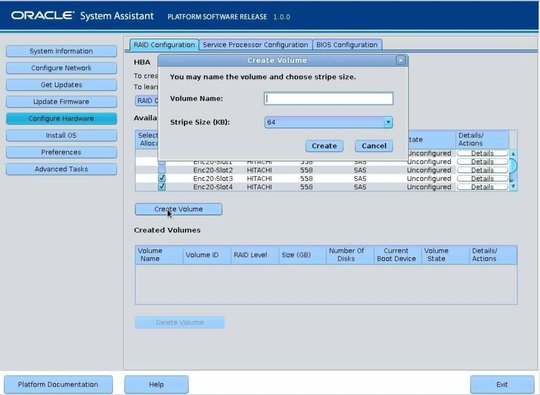
In the Available Disks table, select the storage drives that you want to add to the RAID
volume, and click the Create Volume button.
The Create Volume dialog box appears.
-
In the Create Volume dialog box:
-
(Optional) Enter the volume name.
Entering a volume name is optional. If you do not name the volume, Oracle System Assistant creates a volume without a name.
- Select the volume stripe size.
-
Click Create.
The Creating RAID Volume information box appears.
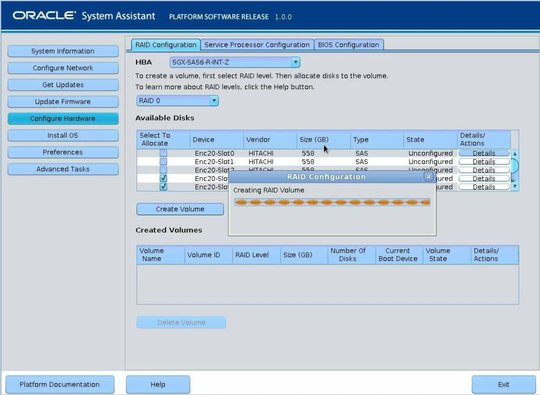
After the volume is created, it is displayed in the Created Volumes table.
-
(Optional) Enter the volume name.
-
In the Details/Action column of the Created Volumes table, click the Details button.
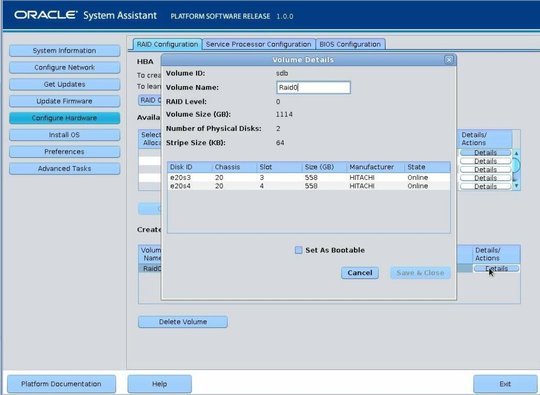
The Volume Details dialog box appears.
-
In the Volume Details dialog box:
- Review the volume details.
-
(Optional) In the Volume Name field, enter a volume name or modify it.
If you did not enter a volume name earlier, the Volume Details dialog box gives you a second chance to do so. If you entered a volume name earlier, you can modify it here; however, you cannot delete the name entirely.
Note - Naming the volume is optional. If you do not name the volume, Oracle System Assistant creates a volume without a name. Additionally, if at any time you want to change the volume name, you can do so by clicking on the Details button in the Created Volumes table; however, once a volume name is assigned, you cannot delete it. - Check the Set As Bootable box.
-
Click Save & Close.
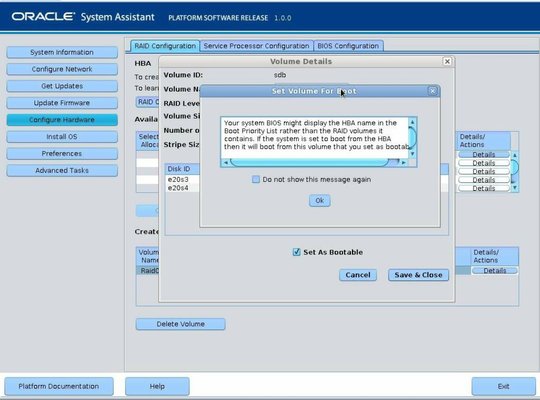
The Set Volume For Boot confirmation dialog appears.
-
Click OK.
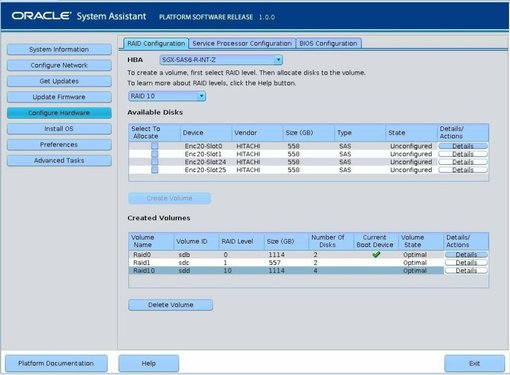
The RAID Configuration screen appears and lists the RAID volume as the current boot device.
-
If you want to designate the created volume as a global hot spare, perform the following
steps; otherwise, proceed to
Step 11.
-
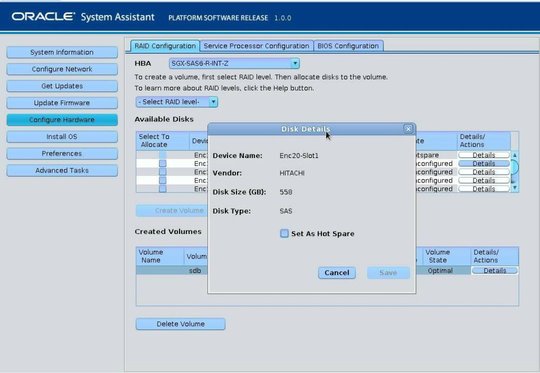
Click the Details button in the Details/Actions column.
The Disk Details dialog box appears.
-
Check the Set as Hot Spare box.
Note - With the Sun Storage 6 Gb SAS PCIe RAID Internal HBA, you can create a maximum of 256 hot spares. -
Click Save.
The Disk Details dialog box closes.
-
Click the Details button in the Details/Actions column.
-
If you want to delete a volume, select it and click the Delete Volume button.
This completes the RAID configuration task.
-
Do one of the following:
-
To select any other Oracle System Assistant task, click the corresponding button in the left panel menu. For example, after configuring RAID, you might want to select the Install OS task and perform an operating system installation.
-
To return to the Oracle System Assistant System Overview screen, click System Information in the left menu panel.
-
To quit Oracle System Assistant, click Exit.
-
Next Steps