Install a CPU Cover Plate
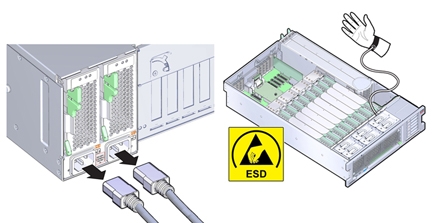
When servicing the components in this section, unplug the AC power cords and use ESD protection.

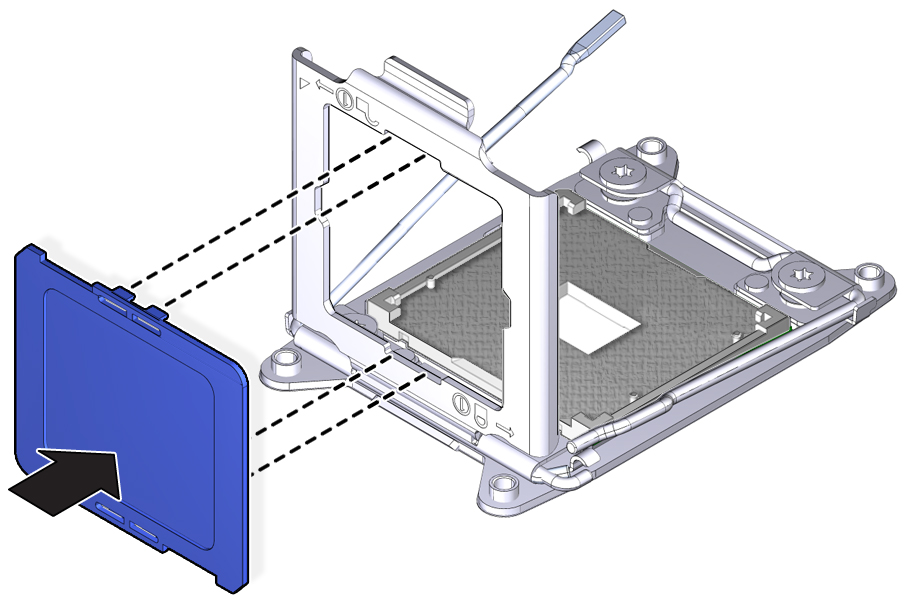
Cover plates are plastic inserts that attach to the CPU load plate and protect the pins of an unoccupied CPU socket. Cover plates are used in a two-CPU server (for the unoccupied slots) and on replacement motherboards. When replacing a motherboard, remove the covers and installed them on the failed board.
Before You Begin
-
For serviceability considerations, see Component Serviceability.
-
For fan module designation information, see Component Designations.
- Prepare the server for service. See Prepare the Server for Cold Service.
-
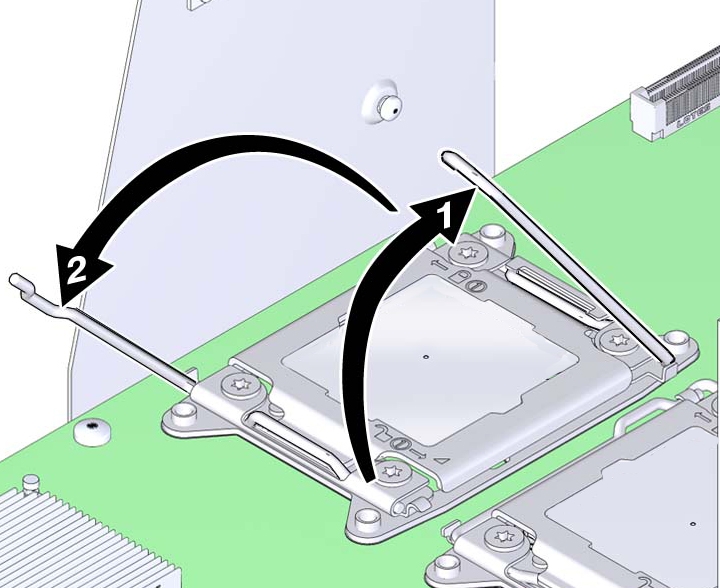
Disengage the CPU load plate release levers by pushing them down and moving them slightly
toward the CPU socket and away from their retaining clips.
The levers are numbered with their required order of operation. The left-side lever (when viewed from the front of the server) must be operated first.

-
Rotate the levers to the fully-open position.
When the second lever is in its fully-open position, the load plate is unlocked.
- To open the load plate, lift the unhinged end to its fully-open position.
- If necessary remove the CPU using the CPU replacement tool. See Remove a Heatsink and CPU (FRU).
-
To install the CPU cover plate, push it onto the top side of the load plate.
The cover snap-fits into the opening in the load plate.

-
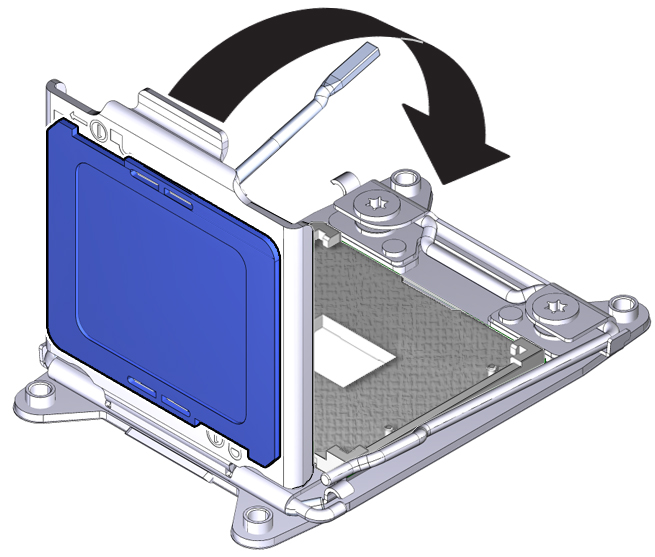
Close and lock the load plate.
