
A storage repository should be at least 10 GB in size. In addition to this minimum size requirement, you should include enough storage space for virtual machines, templates, ISO files and other virtual machine resources.
To create a storage repository for your server pool:
Select the Repositories tab.
In the toolbar above the navigation pane, click Create New Repository
 .
.
In the Create a Repository dialog box, enter the following information:
Repository Name: The name you wish to use to identify the repository.
Repository Location: Either a network file server or a physical disk.
If you selected Network File Server as location, click Search
 to select a location in the Select Network
File System dialog box:
to select a location in the Select Network
File System dialog box:
Select a Network File Server from the list. The available file systems appear. Note that only a refreshed file system can be used.
Select the file system you wish to install the storage repository on. Click OK.
NoteWhen searching for a file system, there is an option to provide a Name Filter. You can use this filter to specify search criteria to limit the objects displayed. See Section 1.13, “Name Filters” for more information.
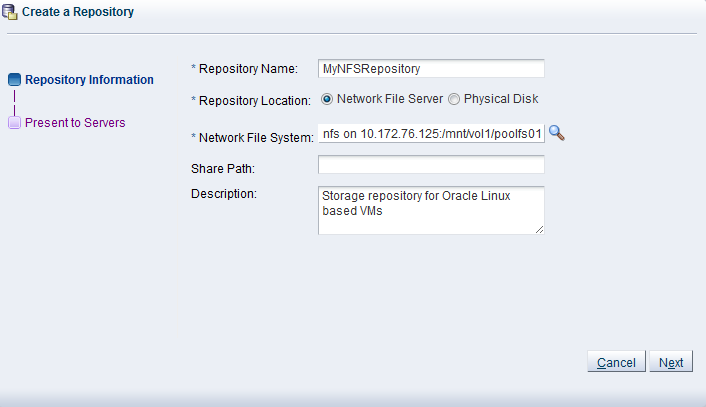
Optionally provide this additional information:
Share Path: Path to a subdirectory on the selected file system.
Description: Information you would like to add about this storage repository.
If you selected Physical Disk as the Repository Location, click Search
to select a location in the Select
Physical Disk dialog box:
Select a Storage Array and, if applicable, a Volume Group from the respective lists. The available disks appear.
Select the physical disk you wish to install the storage repository on. Click OK.
NoteWhen searching for a physical disk, there is an option to provide a Name Filter. You can use this filter to specify search criteria to limit the objects displayed. See Section 1.13, “Name Filters” for more information.
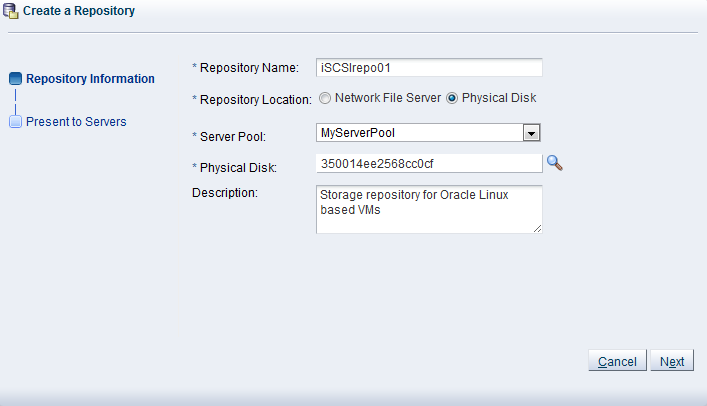
Select from the list to which Server Pool this storage repository should be provided. Optionally enter additional information about this storage repository in the Description field.
NoteWhen you create a storage repository on a LUN, only clustered server pools can be selected.
Click Next to proceed to the second section of the wizard: Present to Servers.
When the storage repository is prepared and created, it must also be made available for use by your Oracle VM Servers before it can be populated. Typically you present the storage repository to all the Oracle VM Servers in the server pool. However, should you wish to set up storage differently, Oracle VM Manager allows you to present a repository to a selection of Oracle VM Servers instead of the entire server pool. See also Section 4.3.1.4, “Present or Unpresent Repository”
In the Present to Servers dialog box, use the arrow buttons to move the required Oracle VM Servers from the left to the right pane.
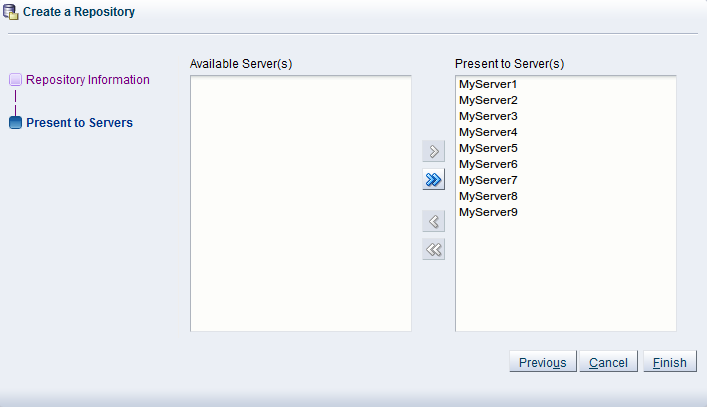
Click Finish to create the new storage repository and present it to the selected Oracle VM Servers. The new storage repository is displayed in the Repositories table in the management pane.
At this point, the storage repository has been created, Oracle VM Manager has taken ownership, and the selected Oracle VM Servers have access in order to store virtual machines, ISO files, templates and so on. To modify the configuration of servers with access to the storage repository, see Section 4.3.1.4, “Present or Unpresent Repository”.