
To create a server pool:
Click Create Server Pool
 in the toolbar to start the Create Server
Pool wizard.
in the toolbar to start the Create Server
Pool wizard.
The Create Server Pool step is displayed in the wizard.

Enter the server pool information:
Server Pool Name: The name of the server pool. The maximum length of a server pool name is 256 characters and may contain any character.
Virtual IP Address for the Pool: An IP address used to identify the master Oracle VM Server, which controls the other Oracle VM Server in the server pool. In the event that the master Oracle VM Server fails or is placed into maintenance mode, another Oracle VM Server is selected to perform the master role, and this IP address is then assigned to the new host. The virtual IP address must be an unused IP address within the same subnetwork that is used for the management network.
VM Console Keymap: The key mapping to be used when connecting to a virtual machine's console.
VM Start Policy: For each server pool you can define the default start-up policy for all of your virtual machines. Options include the ability to start the virtual machine on the current server (the server to which the virtual machine has been assigned) and the ability to start the virtual machine on the best available server (determined using the same algorithms as DRS and DPM). It is possible to override the default policy within the configuration of each virtual machine. See Section 3.1.3, “Create Virtual Machine” for information on setting the start policy for an individual virtual machine. Note that as of Release 3.3, the VM Start Policy also applies to the VM Resume operation.
Secure VM Migrate: Select whether to enable encrypted migration of virtual machines. When Secure VM Migrate is checked, virtual machines are migrated using SSL to protect the data during the migration process. Secure migration of a virtual machine may effect the time taken to perform the migration as the encryption and decryption of data requires more system resources and time.
Clustered Server Pool: Select whether to enable clustering of the Oracle VM Servers in the server pool to enable HA. See How do Server Pool Clusters Work? and How does High Availability (HA) Work?in the Oracle VM Concepts Guide for more information on server pool clustering and on HA support and policies.
ImportantIf the Oracle VM Servers in your server pool are SPARC-based, you should be aware that clustering can only function if the distributed lock manager package is installed on all of the Oracle VM Servers that you intend to add to the server pool, as described in Installing DLM for SPARC Server Pool Clusters in the Oracle VM Installation and Upgrade Guide. Furthermore, clustering is not supported for servers that have multiple control domains (shadow domains). Clustering for SPARC is only supported using NFS storage for the cluster file system. Failure to meet these requirements results in an error when attempting to create the clustered server pool, notifying you that the server lacks the ability to perform clustering.
Timeout for cluster: If clustering is enabled for the server pool, this option allows you to set the timeout parameter. The maximum cluster timeout setting is 300 seconds. The minimum cluster timeout is 12 seconds. The default cluster timeout is 120 seconds. The Disk heartbeat and network heartbeat are automatically derived from the cluster timeout value.
The cluster timeout can only be changed when there are no servers in the server pool, therefore it is usually good to set this during the creation of your server pool.
NoteThis option is greyed out if the Clustered Server Pool check box is unchecked.
Storage for Server Pool: Select the file system type to use for the server pool, either a Network File System, or a Physical Disk. The server pool file system is used to hold the server pool cluster data, and is also used for cluster heartbeating. Oracle recommends that you create this storage with a size of at least 12 GB, as a NAS export or LUN. Note that if you are creating a SPARC-based server pool, only NFS is supported for a server pool file system.
A server pool file system is exclusive, just like other storage. That is, in the same way that you cannot create two storage repositories on the same export path, the server pool file system cannot be shared with other server pools, or with storage repositories. Each fully qualified export path (for example, /export/myexport/one, /export/myexport/two) must be used for one, and only one, purpose, that is, for a storage repository, or a server pool file system.
NoteThis option is greyed out if the Clustered Server Pool check box is unchecked.
For information on creating storage, see Chapter 6, Storage Tab.
Network File System: The file system to use as the pool file system. Click Search
 in the Storage Location
field to search for a network file system. This field is
displayed if you select Network File System in the previous
field.
in the Storage Location
field to search for a network file system. This field is
displayed if you select Network File System in the previous
field.
Physical Disk: The file system to use as the pool file system. Click Search
in the Storage Location
field to search for a physical disk. This field is displayed
if you select Physical Disk in the previous field.
Description: A description of the server pool. This field is optional.
Click Next.
The Add Servers step is displayed in the wizard.
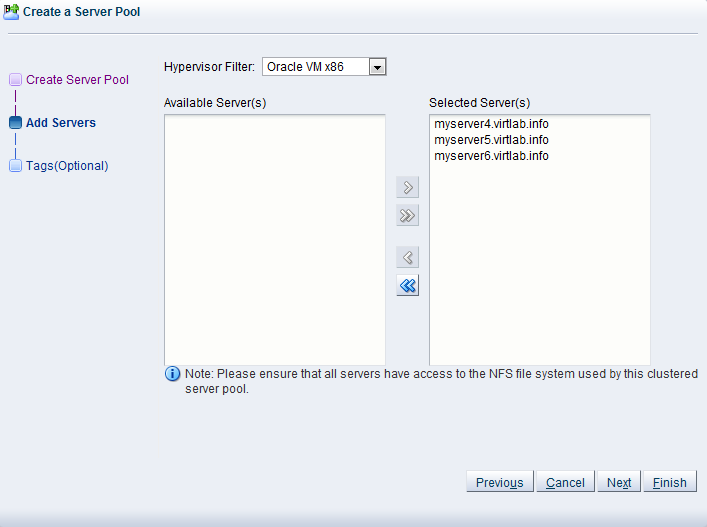
The Hypervisor Filter field allows you to specify the hypervisor type to use for the server pool. Selecting the
Oracle VM x86hypervisor, limits the available servers to show only x86 systems; while selecting theOracle VM SPARChypervisor, limits the available servers to show only SPARC systems within your environment. If your environment does not contain systems of more than one hypervisor, the filter is greyed out and is automatically set to the hypervisor available within your environment. It is not possible to create a server pool consisting of servers that use different hypervisors.Select the Oracle VM Servers to add to the server pool from the Available Servers column and move them to the Selected Servers column.
If you have defined tags and wish to add any to the server pool, click Next. Otherwise, click Finish.
The Tags step is optional and displays in the wizard if you clicked Next in the previous step.
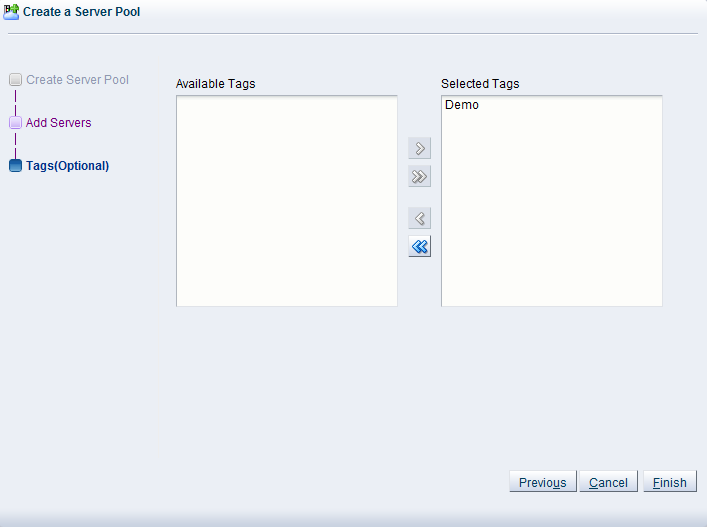
If you have defined tags previously, they appear in the Available Tags column. You can select the tags that you wish to apply to the server pool and move them to the Selected Tags column.
See Section 1.14, “Tags” for more information on creating and managing tags.
Click Finish.
The server pool is created.