To discover a file server:
Make sure that your storage server exposes a writable file system to the storage network of your server pool.
Select the Storage tab.
Click Discover File Server
 in the toolbar to start the Discover a
File Server wizard.
in the toolbar to start the Discover a
File Server wizard.
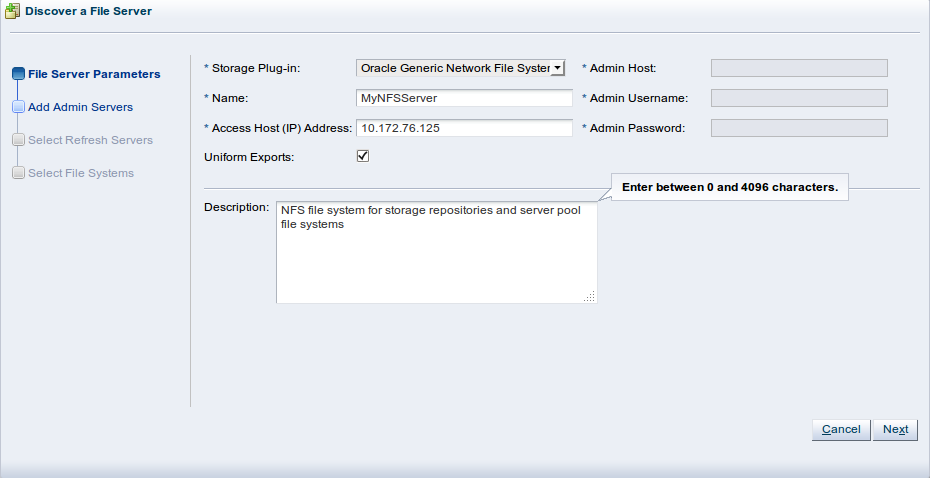
The File Server Parameters step is displayed in the wizard, where you enter the information necessary for Oracle VM Manager to discover the external storage mount points.
Enter the storage information:
Storage Plug-in: The Oracle VM Storage Connect plug-in corresponding to the type of file server (generic NFS or vendor-specific). As Oracle VM Storage Connect plug-in are located on the Oracle VM Servers, this field is only populated if you have already performed Server Discovery. You cannot add storage without taking this step first.
Name: The name you wish to use to identify the file server.
Access Host: The host name or IP address of the server offering the file system.
Uniform Exports: If all Oracle VM Servers in all server pools have access to the same exports on the file server, leave this as the default (checked). If the file server is configured to offer different exports to different server pools, this box should be unchecked and, once you have completed the steps in the wizard, you need to configure Access Groups so that Oracle VM Manager can be made aware of export permissions. See Section 6.4.4, “Access Groups Perspective” for more information.
ImportantNon-uniform exports are not intended for servers within the same server pool. Your NFS server should be configured to, at least, provide the same exports to all of the servers that belong to a particular clustered server pool.
Description: Optional information you would like to add about this file server.
If you are adding a non-generic file server, for example a Sun ZFS Storage Appliance, also enter the additional plug-in options to enable Oracle VM Manager to access the file server's configuration management functions:
Admin Host: The host name or IP address where administrative access to the file server is allowed with appropriate credentials.
Admin User Name: A user name with administrator access to the file server.
Admin Password: The administrator password for the user name you entered.
Click Next.
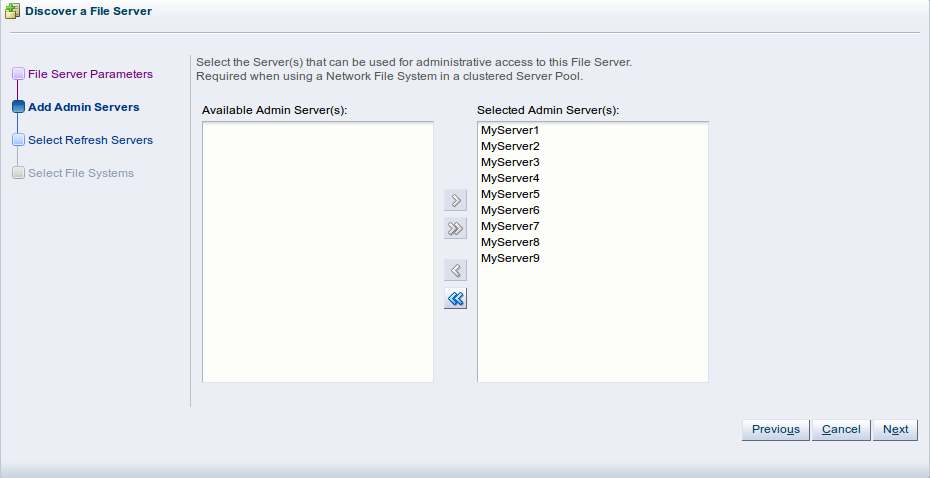
The Add Admin Servers step is displayed in the wizard. If you are working with a non-clustered server pool, you may skip this step. Admin servers are designated Oracle VM Servers that are capable of logging into a storage array or file server to perform administrative functions such as extending a file system or creating a new LUN. In the case of an NFS file server, admin servers are only used to validate the file server. For backward compatibility reasons, admin servers are also capable of being used to perform file server refreshes in much the same way as refresh servers.
Use the arrow buttons to move the required Oracle VM Servers from the Available Admin Server(s) box to the Selected Admin Server(s) box.
Click Next.
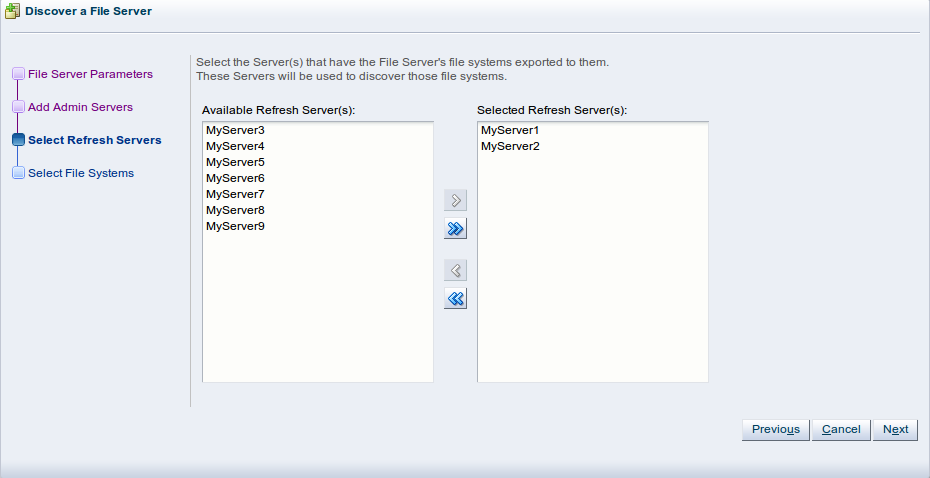
The Select Refresh Servers step is displayed in the wizard. Refresh server are designated Oracle VM Servers that have visibility of one or more file systems on an NFS file server. These servers are used for file system refreshing across server pools.
Each file system must be assigned at least one refresh server to allow for file system refreshing. During the refresh of a file server, the refresh servers are used to refresh all file systems used across all pools. For this reason it is critical that your refresh server list contains at least one server from each server pool.
ImportantIn some environments, it is plausible to expect that the file server is configured to provide different file system exports to different server pools. Therefore, it is possible that no single server has access to all of the exports provided by a file server. By assigning a server from each server pool to handle file system refreshes, Oracle VM can ensure that all file systems are refreshed across all server pools. If your environment is set up in such a way, you need to configure Access Groups so that the manager can be made aware of export permissions. See Section 6.4.4, “Access Groups Perspective” for more information.
If you select the Refresh All option available in the context menu for Server Pools on the Servers and VMs tab, the configured refresh servers specified for each file system are used to perform a comprehensive file system refresh and you are not provided with an option to use one or more alternate refresh servers.
In this dialog, you must include at least one server from each server pool that you intend to create. You may select more than one server from each server pool in order to ensure high availability, but adding more than two servers is superfluous.
NoteIf you defined a group of admin servers in the previous step, for backward compatibility reasons, these servers are added to the refresh server list, and can be used to perform file server refreshes as well. This is not apparent in the Oracle VM Manager Web Interface.
If you are using non-uniform file system exports (as selected in the first dialog of this wizard), click Finish to complete the wizard. A message is displayed to inform you that you should now create access groups for the file server. See Section 6.4.4, “Access Groups Perspective” for information on creating an access group. When at least one access group is configured, you should then refresh the file systems on the file server to make them available for use in Oracle VM Manager. Section 6.3.1.5, “Refresh File Server” for information on refreshing a file server.
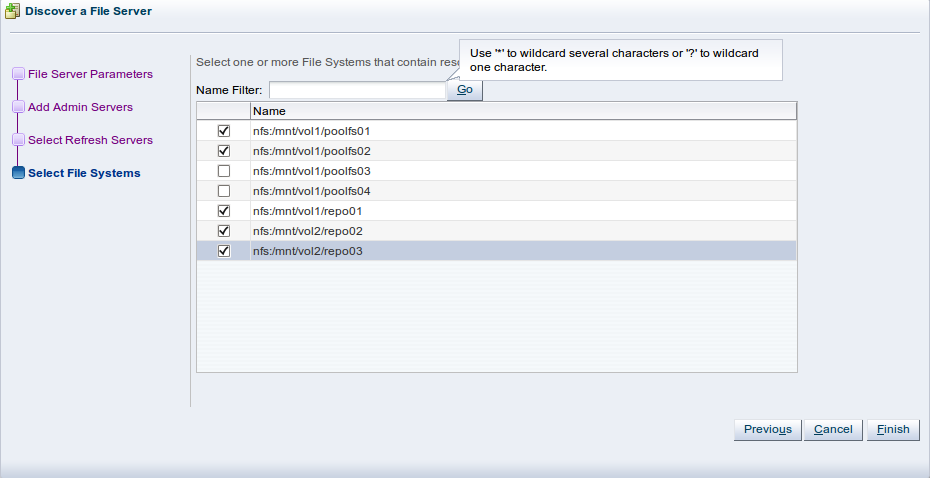
If you are using uniform file system exports, click Next to proceed to the Select File Systems step of the wizard. If any file systems contain existing virtual machine resources, select the corresponding check boxes to have Oracle VM Manager add the existing resources to the environment.
At the top of the dialog box there is an option to provide a Name Filter. You can use this filter to specify search criteria to limit the objects displayed. See Section 1.13, “Name Filters” for more information.
Click Finish to complete the file server registration.
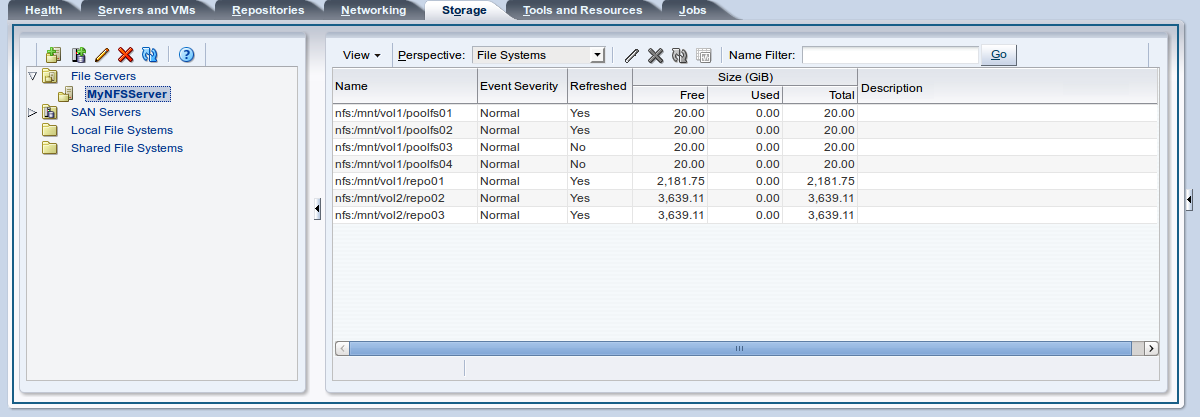
The new file server appears in the navigation pane, under File Servers.
NoteIf you created shares to be used as server pool file systems, these are discovered in the same process. Since these file systems are relatively small, be sure to keep those available for the server pools and create storage repositories on the higher capacity file systems.
At the end of the file server discovery a refresh operation is triggered to make sure all file systems available on the file server appear in Oracle VM Manager. When the operation is complete, and if you select the file server in the navigation pane, the available file systems appear in the File Systems overview table in the management pane.
WarningIf a server is unable to mount the file system for some reason, such as a permissions related issue, Oracle VM Manager does not report the failure as this would stop any further mounting. If a server is unable to access a file system the reason is reported in the
/var/log/ovs-agent.loglog file on the server.