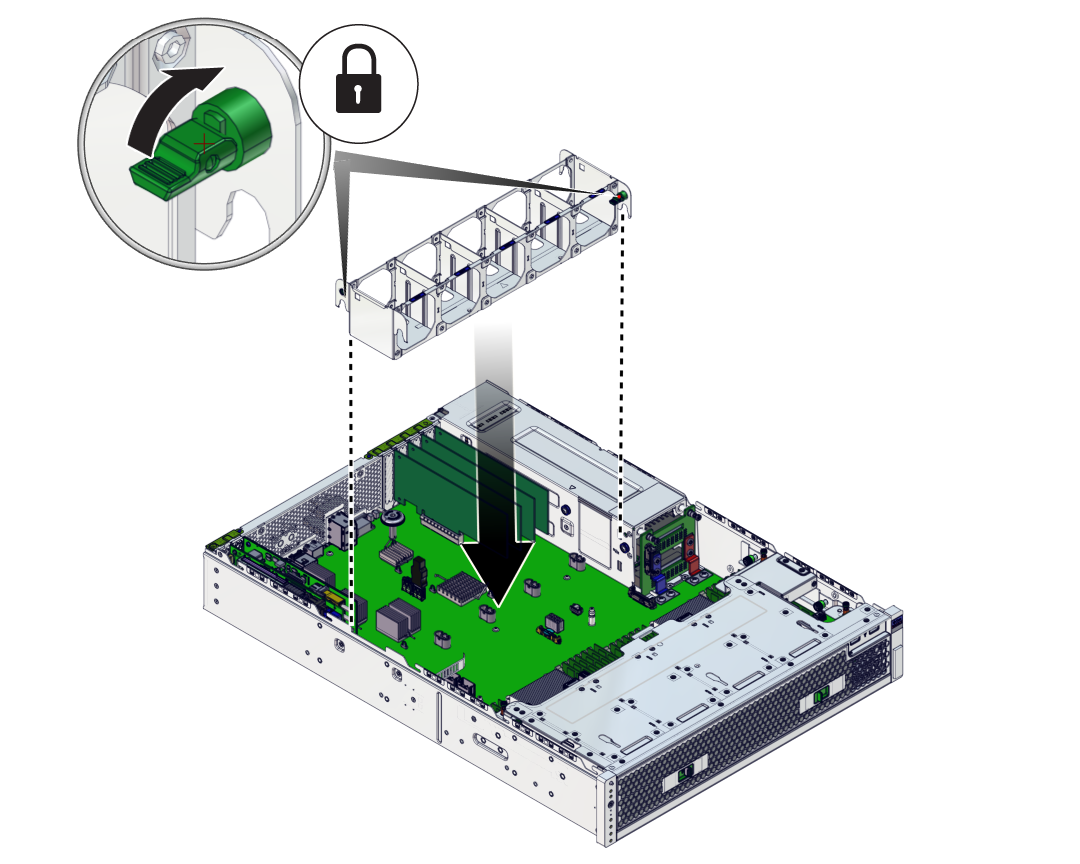
Install the Fan Tray
Perform this task when you have previously removed the fan tray.
-
If you previously removed the PSU and air ducts or raised the drive cage, complete these prerequisites, as necessary, in this order.
See:
-
Move any loose cables so that they are against the server walls.

Caution - The fan tray goes inside the latch line of the cable pass through. Take care when installing the fan tray so that the cable pass through is not damaged or unseated.
-
Install the fan cage bracket, being careful to avoid damage to any mother board components that are near the end of the bracket that gets secured to the motherboard.

Caution - The fan tray sits on top of the cable pass through. The cable pass through needs to be properly seated when installing the fan tray. If not, damage may occur to the latch.
-
Align the fan tray to where it installs into the server.
Two arrows on the top of power supply bay show where the fan tray aligns. Holes in the base of the tray need to match up with fan connectors. If necessary, rotate the tray 180 degrees to align.
-
Slowly lower the fan tray into the server.
Verify that the fan tray is properly seated, and the top surfaces of the fan tray are flush with the server.
-
Close the two fan tray locks.

-
Install the fan modules.
See Install a Fan Module.
-
Consider your next step.
-
If you installed the fan tray as part of another component's service procedure, return to that procedure.
See Component Service Task Reference for assistance.
- Otherwise, install the top cover.
-
If you installed the fan tray as part of another component's service procedure, return to that procedure.