Install the Motherboard
Installing the motherboard is a cold-service operation. You must power off the server before installing the motherboard.
-
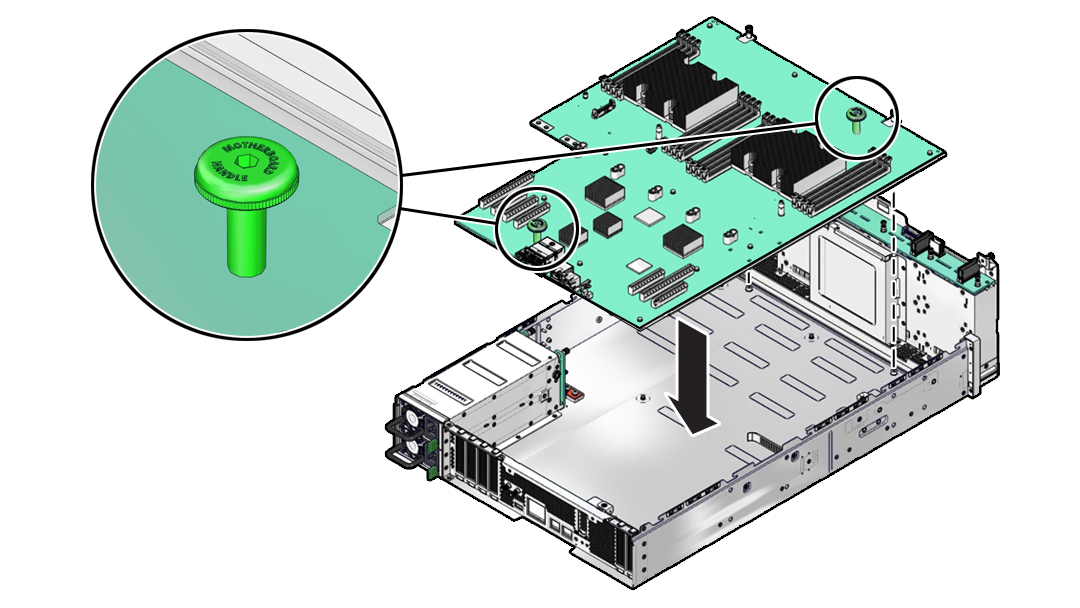
Position the motherboard for installation into the server.
The heatsinks are toward the front of the server, and the ports are at the rear.
-
Lift the motherboard by the handles, and slowly lower the motherboard into the chassis.

Caution - Take care when using the handles to install the motherboard. These handles are not in weight-balanced locations. Avoid flexing the motherboard.

Caution - Take care to clear the four screws at the rear of the chassis. The screws are long and might scratch or damage the motherboard.

- Tilt the motherboard to clear the cable tie mounted on the left.
- Lower the motherboard onto the bottom alignment pins.
- Slowly slide the motherboard until it drops, engaging the bottom alignment pins.
- Carefully insert the LED into the hole at the rear of the chassis.
-
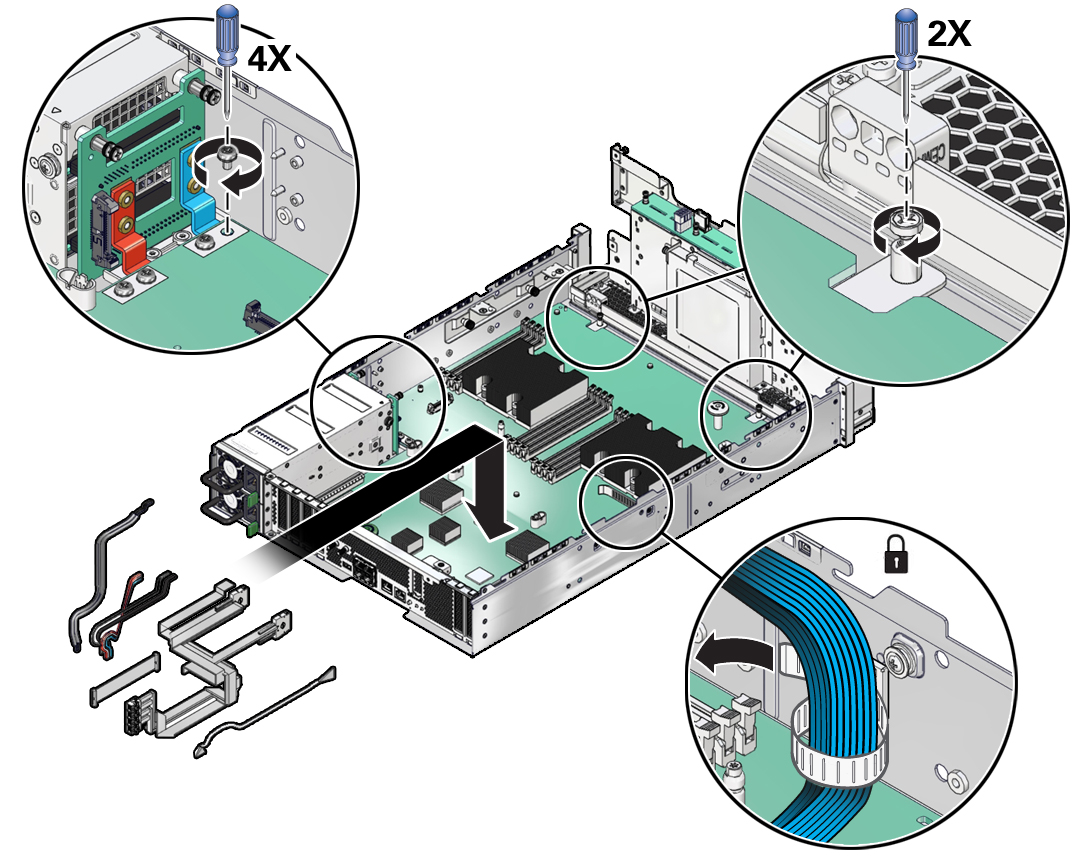
Continue to slide the motherboard forward until it seats.
The rear of the motherboard must be flush with the rear of the server. Additionally, the four holes in the motherboard must align with the four holes in the bus bars.
-
Tighten the captive screw.

- Install and tighten the four bus bar screws.
- Install the right thumb screw bracket.
- Reconnect the cables you previously disconnected.
- If you installed the motherboard as part of another component's removal or installation procedure, return to that procedure.
-
Review this information and complete these prerequisites in this order.
See:
-
Install all DIMMs.
Tip - With the faulty motherboard aligned to match the orientation of the new motherboard, transfer the DIMMs so that they are installed in the corresponding slots of the new motherboard. -
Install all fan modules.
-
-
Complete these postrequisites in this order to finish the installation
procedure.
See:
-
Restore the Oracle ILOM variables.
See http://docs.oracle.com/cd/E19860-01/E21549/z40015841018582.html#scrolltoc
- Set the date and time.