Remove a SAS Drive
Removing a SAS drive is a hot-swap operation. You must run commands on the server before you remove the drive.
- Determine which drive to remove.
-
Consider your next step.
-
If you have not prepared for service, do so now. See Preparing for Service.
-
If you are removing a drive as part of another component's removal or installation procedure, go to Step 3.
-
-
Remove the filter.
See Remove the Filter.
-
Determine if you need to shut down the OS to remove the drive, and perform one
of these actions.
-
If the drive cannot be taken offline without shutting down the OS, follow instructions in Power Off the Server (Power Button - Graceful) then go to Step 7.
-
If the drive can be taken offline without shutting down the OS, go to Step 5.
-
-
Take the drive offline according to your OS.
See your OS documentation.
-
Verify that the drive's blue Ready-to-Remove LED is lit.
See SAS Drive LEDs.
-
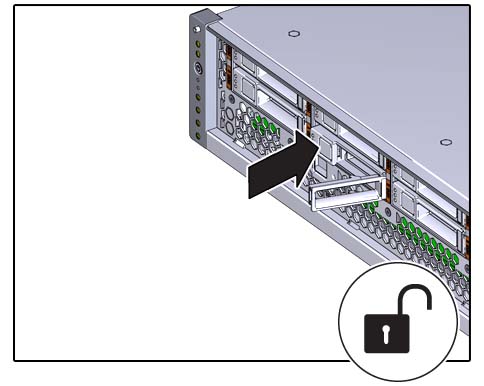
Press the release button and pivot the release lever open to the right.

-
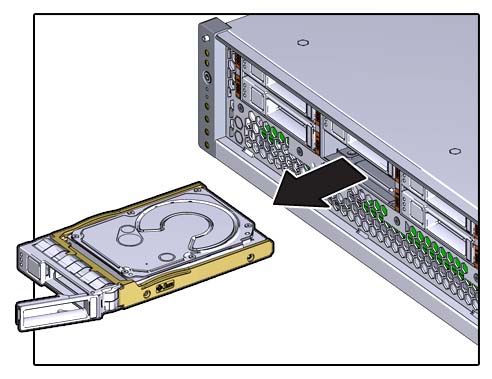
Grasp the release lever and pull the drive out of the chassis.

- Set the drive aside.
- Repeat from Step 5 for any additional drives to be removed.
-
Consider your next step.
-
If you removed a drive as part of a replacement operation, install a new drive. See Install a SAS Drive.
-
If you removed a drive as part of another component's removal or installation procedure, return to that procedure. See Component Service Task Reference for assistance.
-
If you are not replacing the drive, install a drive filler panel in its place. See Install a SAS Drive.

Caution - Overheating hazard. There must be no empty drive slots.
-