Install a CPU
Installing a CPU is a cold-service operation. You must power off the server before installing the CPU.
- Review this information and complete these prerequisites in this order, if you have not done so already.
- Unpack the replacement processor and place it pin side down on an antistatic mat.
-
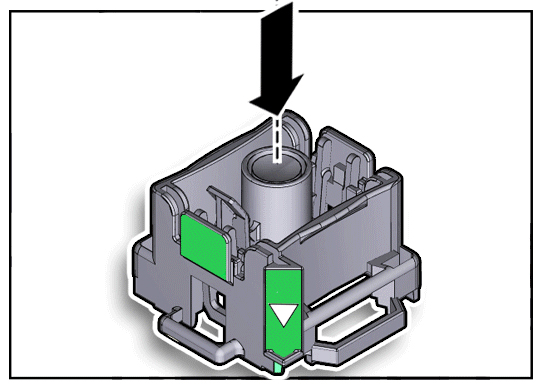
Press the release button on the CPU tool to open the securing clips.
See CPU Tool.
-
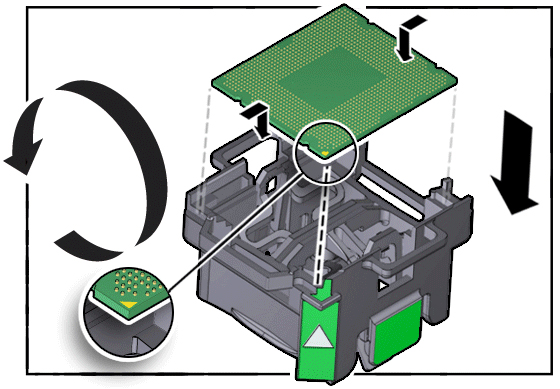
Turn the tool upside down and lower the CPU into the tool, pin side up.
The triangle on the side of the tool aligns with pin 1 of the CPU.
-
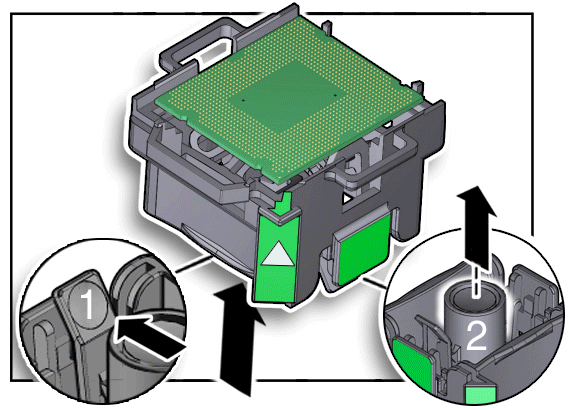
Press the hold lever outward to engage the CPU.
You hear a click, and the release button retracts.
-
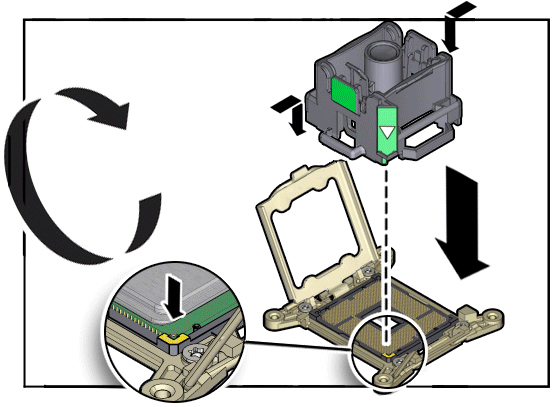
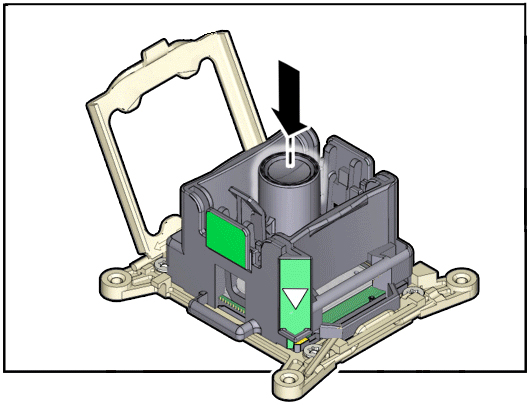
Position the tool over the CPU socket and lower it into place.
The triangle on the side of the tool aligns with pin 1 of the CPU socket.

Caution - The tool must be level and flat onto the socket, not offset or angled.
-
Press the release button on the tool to release the CPU into the socket.

Caution - Do not attempt to forcibly seat the CPU.
-
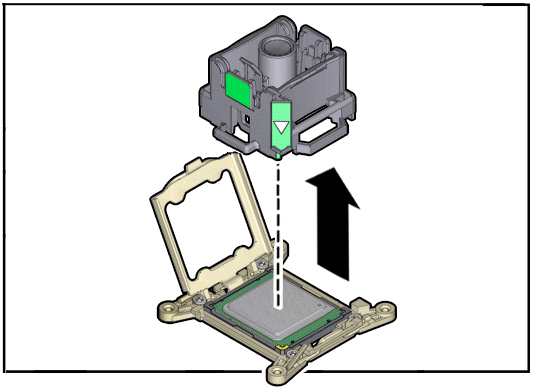
Remove the tool.
The processor should lie flat in the socket, and be properly aligned.
-
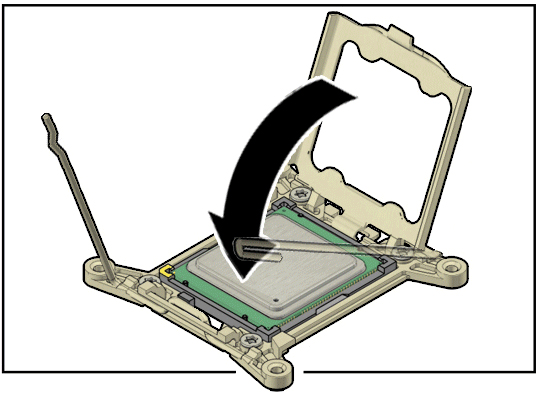
Lower the pressure frame to the closed position.
The pressure frame should sit flat over the processor.
-
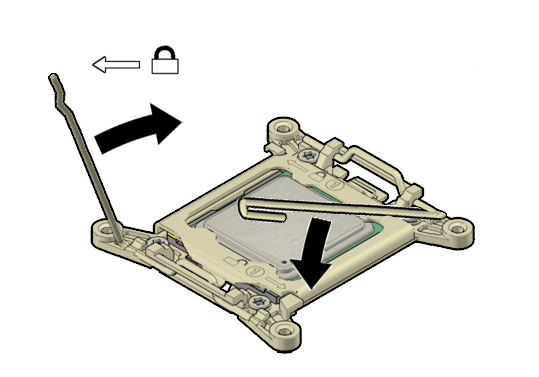
Lower the release levers and hook them under the catches of the CPU
socket.
-
Use the syringe to apply approximately 0.1 ml of thermal compound to the top
center of the CPU.
Note - Do not distribute the compound. The spring pressure of the heat sink will evenly distribute the compound.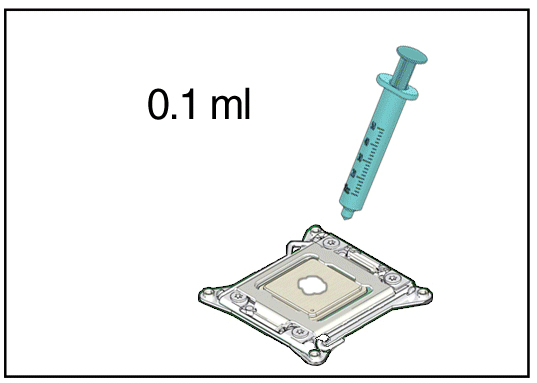
-
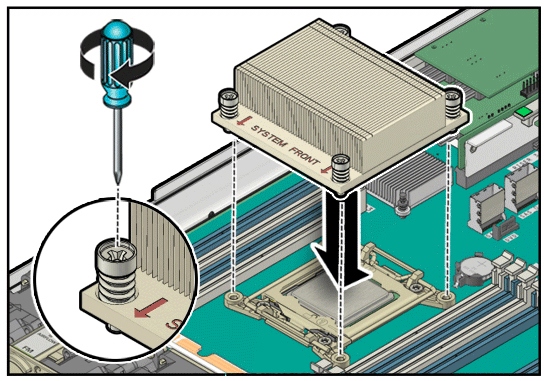
Carefully align the heat sink screws to the mounting posts.
The “System Front” label must face the front of the server.

Caution - Moving the heat sink too much unevenly distributes the thermal compound and can lead to CPU damage.
-
Tighten the four captive screws of the CPU heat sink.
Alternate between the screws in an X pattern, turning each one-half revolution, until they are fully seated.
- Review this information and complete these postrequisites in this order.
- Return the server to operation.
-
Verify the functionality of the CPUs by checking for faults.
See Locate a Faulty CPU.