Install a DIMM
Installing a DIMM is a cold-service operation. You must power off the server before installing the DIMM. This procedure is the same for installing a DIMM filler.
-
Consider your first step.
-
If you are replacing a DIMM, remove the faulty or obsolete DIMM first, then return to this procedure, Step 3. See Remove a DIMM.
-
If you are installing a new or an additional DIMM, go to Step 2.
-
If you are installing a DIMM as part of another component's removal or installation procedure, go to Step 3.
-
- Review this information and complete these prerequisites in this order.
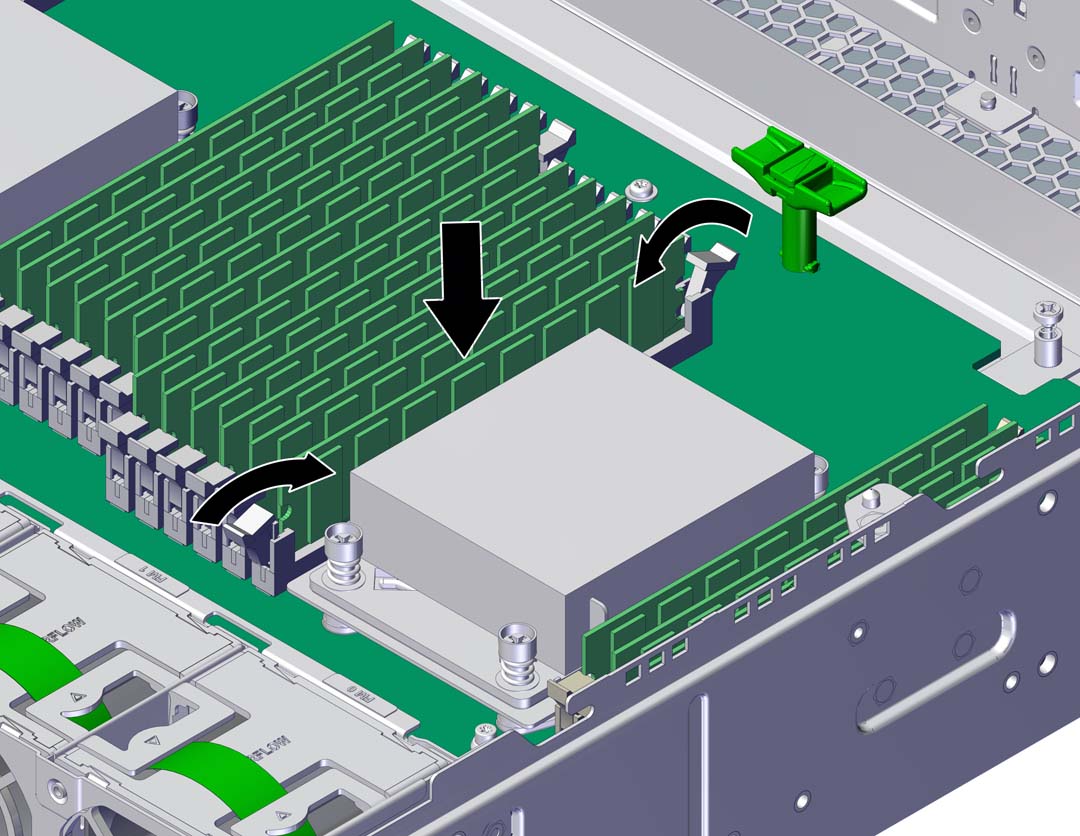
- Open the release levers of the slot where you are installing the DIMM.
-
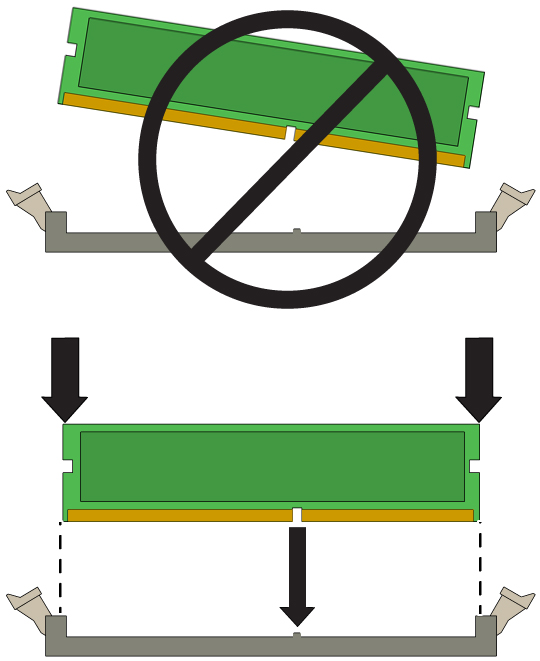
Align the DIMM to the location where it installs into the slot.

Ensure that the notch in the DIMM lines up with the key in the slot.
-
Insert the DIMM into the slot, pressing firmly so that both release levers
click closed.

- Repeat from Step 3 through Step 5 for any additional DIMMs that you are installing.
-
Consider your next step.
-
If you installed a DIMM as part of a replacement operation, go to Step 8.
-
If you installed a DIMM as part of another component's removal or installation procedure, return to that procedure. See Component Service Task Reference for assistance.
-
If you have installed a new DIMM, go to Step 8.
-
- Review this information and complete these prerequisites in this order.
- Complete these postrequisites in this order to finish the installation procedure.