Install a SAS Drive
Installing a SAS drive is a hot-plug operation. You do not need to power off the server before installing the drive. This procedure is the same for installing a drive filler panel.
-
Consider your first step.
-
If you are replacing a drive, remove the faulty or obsolete drive first, then return to this procedure, Step 3. See Remove a SAS Drive.
-
If you are installing a new or an additional drive, go to Step 2.
-
If you are installing a drive as part of another component's removal or installation procedure, go to Step 3.
-
- Review this information and complete these prerequisites in this order.
-
Push the release button of the drive.
The release lever pops out.
-
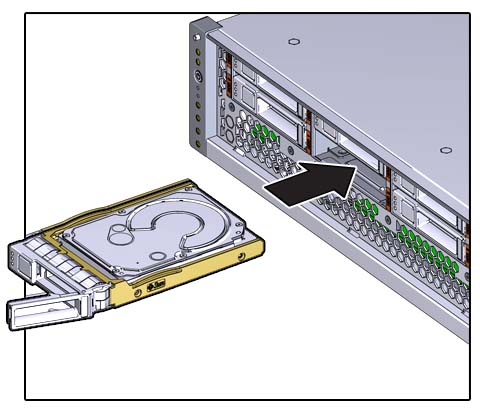
Align the drive with the slot where it installs into the chassis.

The connector is at the rear of the drive and the release button is on the left.
- Press on the drive to slide the drive into the chassis until the release lever moves slightly inward.
-
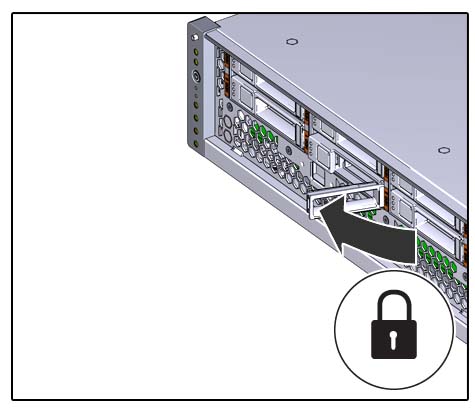
Press the release lever fully closed with a click, securing the drive into the
chassis.

- Repeat from Step 3 through Step 6 for any additional drives that you are installing.
-
Consider your next step.
-
If you installed a drive as part of a replacement operation, go to Step 9.
-
If you installed a drive as part of another component's removal or installation procedure, return to that procedure. See Component Service Task Reference for assistance.
-
If you have installed a new drive, go to Step 9.
-
-
Install the filter.
See Install the Filter.
- Complete these postrequisites in this order to finish the installation procedure.