Install the Motherboard
Installing the motherboard is a cold-service operation. You must power off the server before installing the motherboard.
- Consider your first step.
-
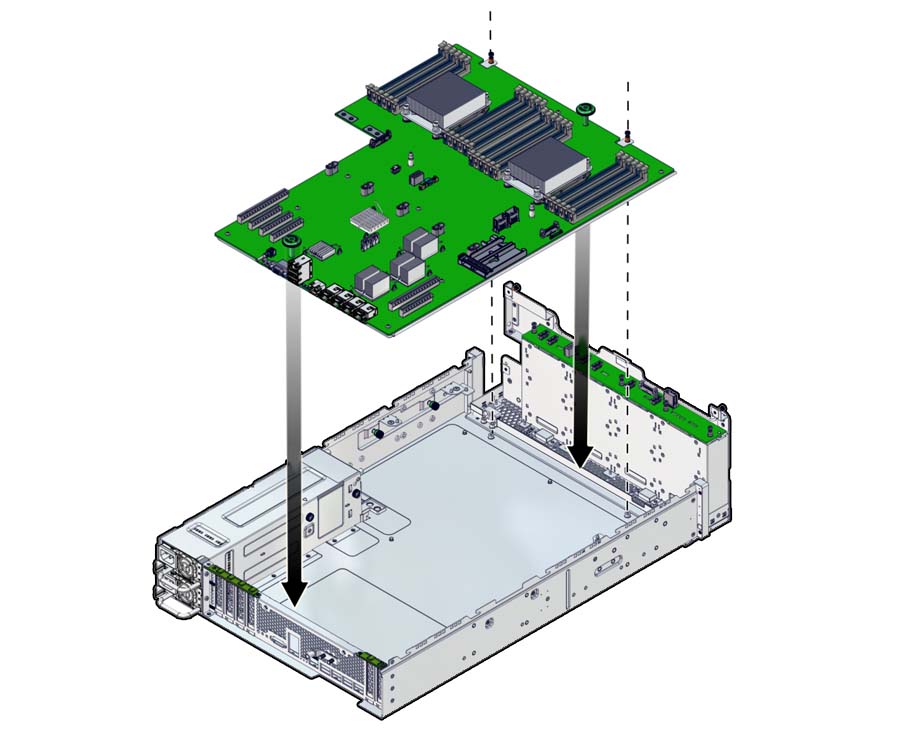
Position the motherboard for installation into the chassis.
The heatsinks are toward the front of the chassis, and the ports are at the rear.
-
Lift the motherboard by the handles and slowly move the motherboard rearward
until the connectors slighty protrude through the rear of the chassis.

- Lower the motherboard onto the bottom alignment pins.
- Slowly slide the motherboard until it drops, engaging the bottom alignment pins.
-
Continue to slide the motherboard forward until it seats.
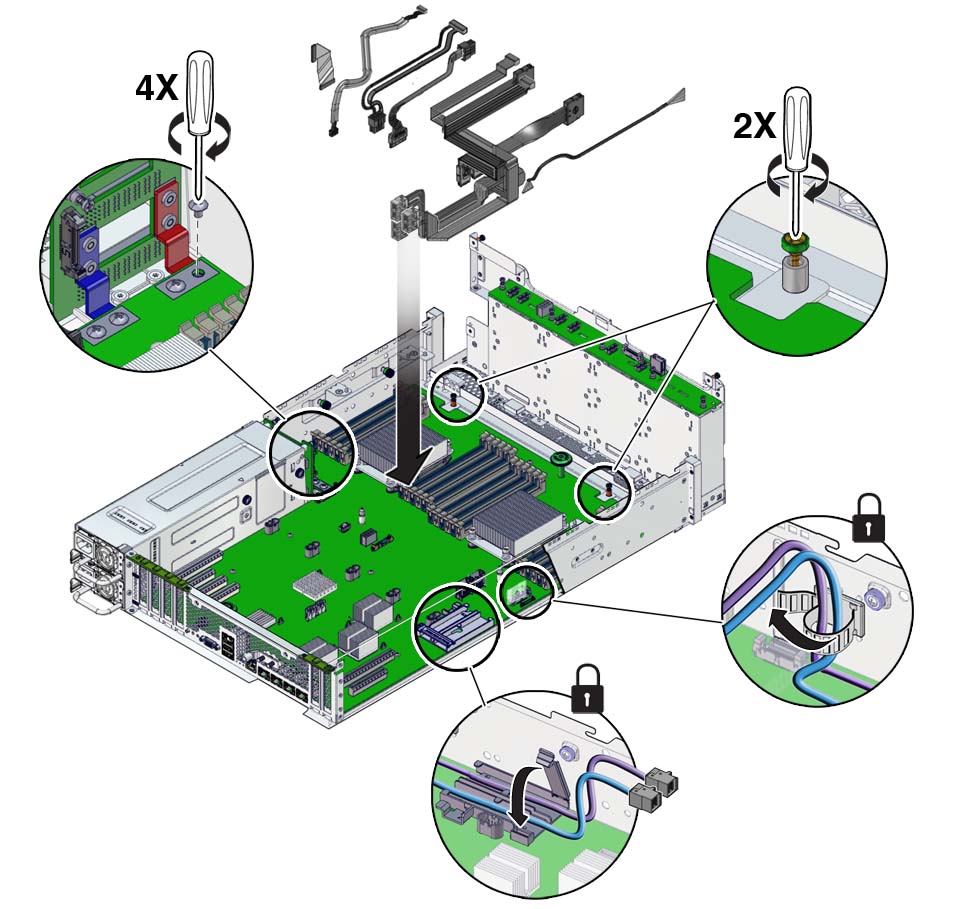
The rear of the motherboard must be flush with the rear of the chassis. Additionally, the four holes in the motherboard must align with the four holes in the bus bars.
-
Tighten the captive screw.

- Install and tighten the four bus bar screws.
- Reconnect the cables you previously disconnected.
-
Consider your next step.
-
If you installed the motherboard as part of a replacement operation, go to Step 11.
-
If you installed the motherboard as part of another component's removal or installation procedure, return to that procedure. See Component Service Task Reference for assistance.
-
-
Review this information and complete these prerequisites in this order.
-
Install all DIMMs.
-
Install all fan modules.
- Complete these postrequisites in this order to finish the installation procedure.