Remove a CPU
Removing a CPU is a cold-service operation. You must power off the server before you remove the CPU.
-
Determine which CPU to remove.
See Locate a Faulty CPU.
-
Consider your next step.
-
If you have not prepared for service, do so now. See Preparing for Service.
-
If you are removing a CPU as part of another component's removal or installation procedure, go to Step 3.
-
- Review this information and complete these prerequisites in this order.
-
Locate the CPU to remove.
See CPU Configuration.
-
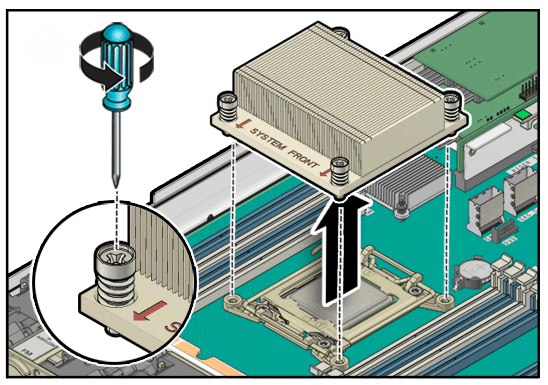
Loosen the four captive screws of the CPU heat sink.
Alternate between the screws in an X pattern, turning each 1 revolution, until they are fully removed.
-
Grasp the heat sink and wiggle it clockwise and counterclockwise while pulling
up.
This action breaks the adhesion of the heat sink to the CPU.

Caution - Do not pull forcibly as you might damage the heat sink or CPU socket.
-
Use an alcohol pad to clean the thermal compound from the heat sink and
CPU.
Note - Be careful not to get the thermal compound on your fingers because this could contaminate components. -
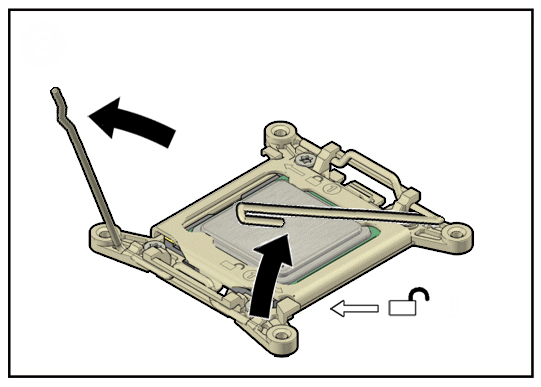
Unhook the pressure frame release levers from the catches of the CPU socket
and raise them upward to approximately 35 degrees.
-
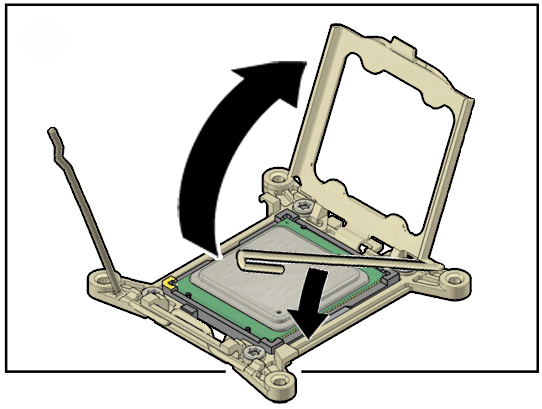
Release the pressure frame by slightly lowering the right release lever and
lifting the pressure frame up to the fully open position.
-
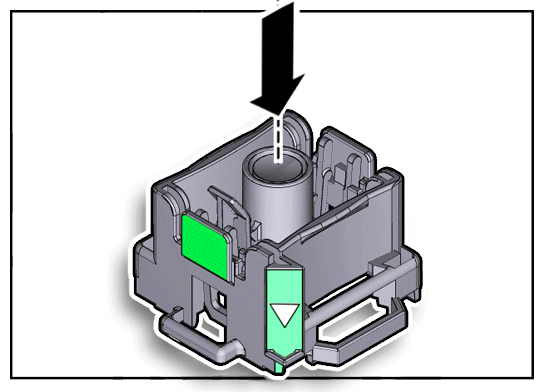
Press the release button on the CPU tool.
-
Position the tool over the CPU socket and lower it onto the CPU.
The triangle on the side of the tool aligns with pin 1 of the CPU.
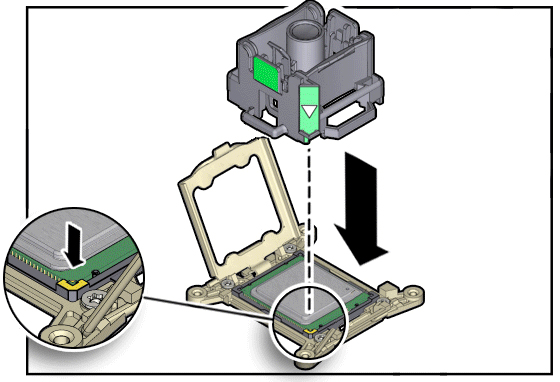
-
Push the hold lever outward to engage the CPU.
You hear a click, and the release button retracts.
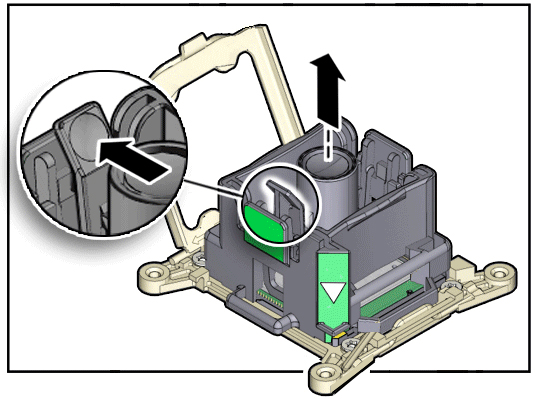
-
Grasp the tool by its sides and lift it from the CPU socket.
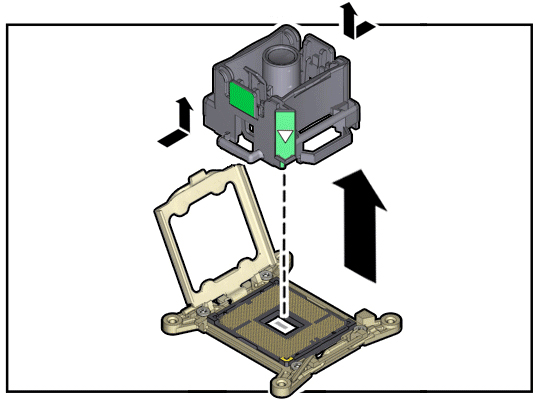
-
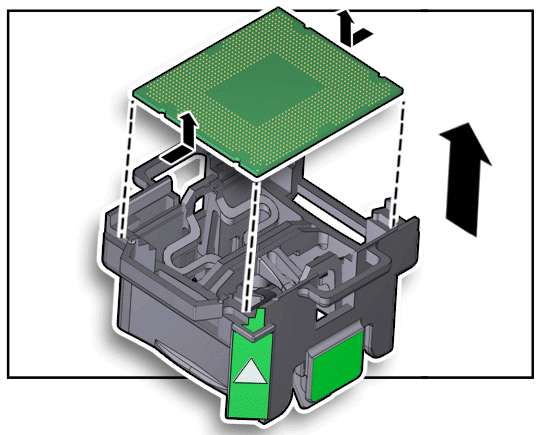
While holding the tool upside down with one hand, and the CPU edges with the
other hand, press the release button.
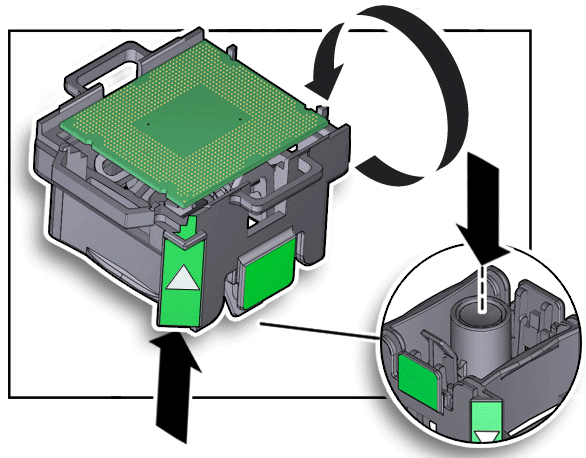
-
Lift the CPU out of the tool and place it pin side down on an antistatic
mat.
- Repeat from Step 4 for any additional CPU to be removed.
-
Install the replacement CPU.
See Install a CPU.