Install the USB Board
Installing the USB board is a cold-service operation. You must power off the server before installing the USB board.
-
Consider your first step.
-
If you are replacing the USB board, remove the faulty or obsolete USB board first, then return to this procedure, Step 4. See Remove the USB Board.
-
If you are installing the USB board as part of another component's removal or installation procedure, go to Step 4.
-
-
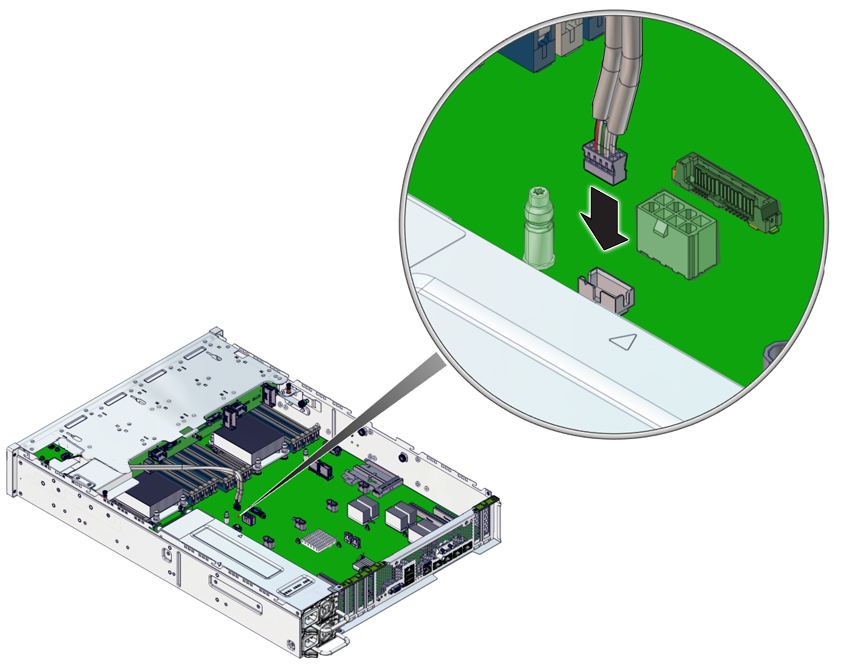
Connect the cable to the motherboard and the USB board.

- Review this information and complete these prerequisites in this order.
-
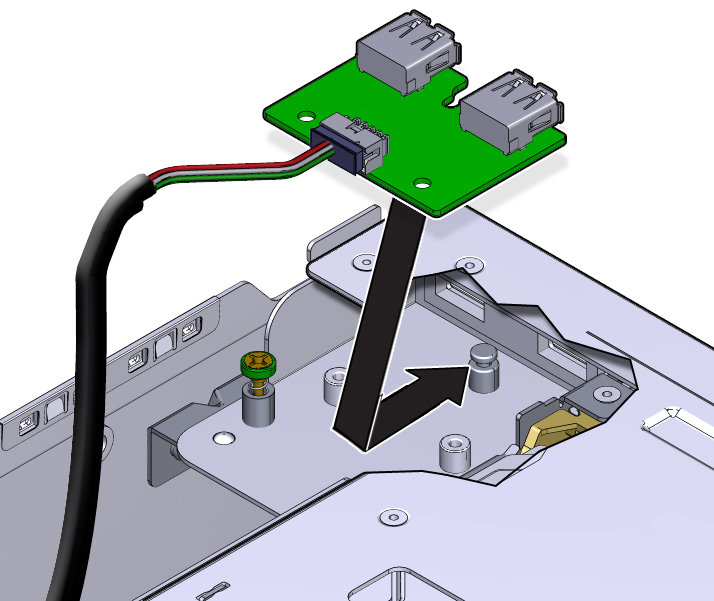
Position the USB board to the location where it installs into the
chassis.
The USB connectors are forward and upward.
-
Lower the USB board to the chassis and slide it forward over the alignment
pin.

-
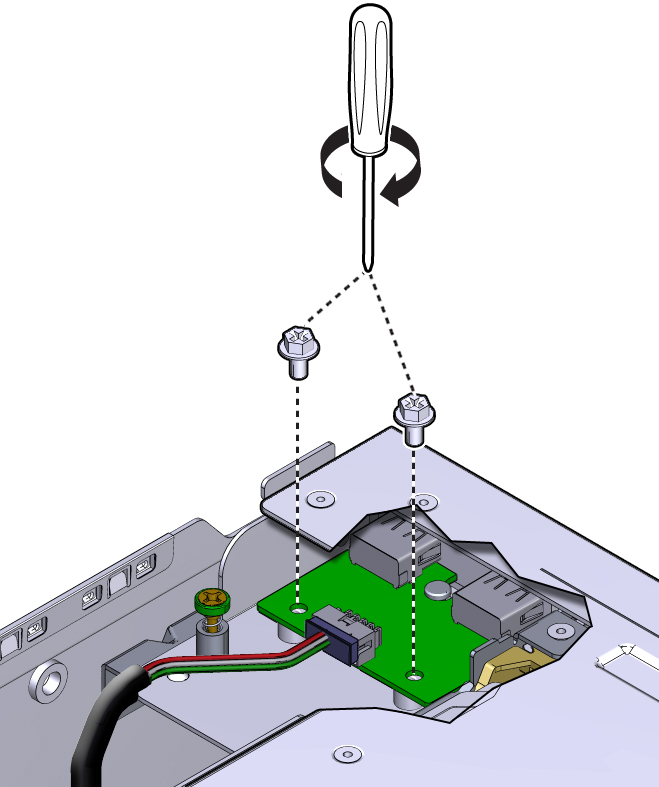
Compress the EMI shielding while you install and tighten the two
screws.

-
Consider your next step.
-
If you installed the USB board as part of a replacement operation, go to Step 8.
-
If you installed the USB board as part of another component's removal or installation procedure, return to that procedure. See Component Service Task Reference for assistance.
-
- Finish the installation procedure.