Remove a Flash Module
- Prepare the server for service.
- Remove the PCI mezzanine and place it on an antistatic mat.
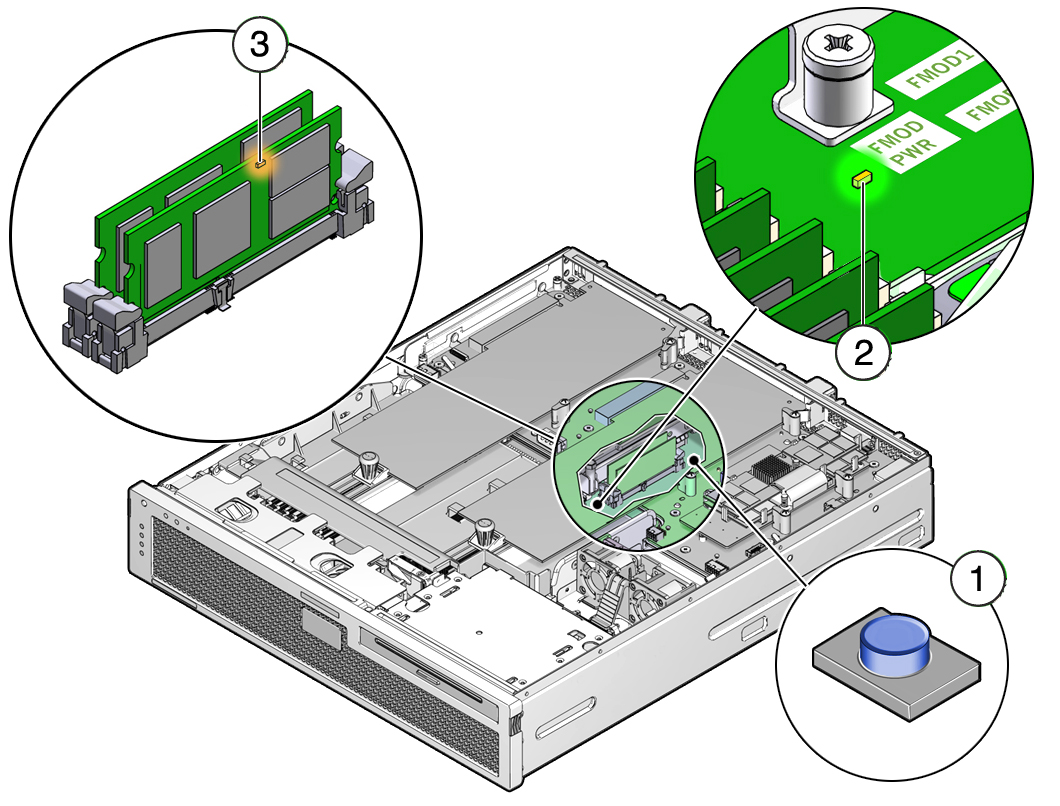
- Locate the installed flash modules on the motherboard in PCIe2 slot 0.
- Identify the faulty flash module
by pressing the Fault Remind button on the motherboard and viewing
the flash module fault and power LEDs.
When a flash module is faulty, an amber LED on the flash module will light when you press the Fault Remind button.

Note - Whenever the Fault Remind button is presses, a LED located next to the Fault Remind button lights green to indicate that there is sufficient voltage present to light any fault LEDs on the motherboard assembly. If this Fault Remind LED fails to light when you press the button, the capacitor power the fault remind circuit might have lost its charge. The capacitor can lose its charged if the Fault Remind button is pressed for a long time or if the power cables have been removed for more than 15 minutes. - Verify that the flash module
power LED on the motherboard assembly is off.

Caution - Removing a flash module when the flash module power LED is lit will damage the flash module.
- Remove the flash module by pressing
down both ejector levers until the flash module partially ejects
from its socket.
Carefully lift the flash module out of its socket and place it on an antistatic mat.
- Consider your next step:
If you removed the flash module as part of another procedure, return to that procedure.
Otherwise, continue to Install a Flash Module.