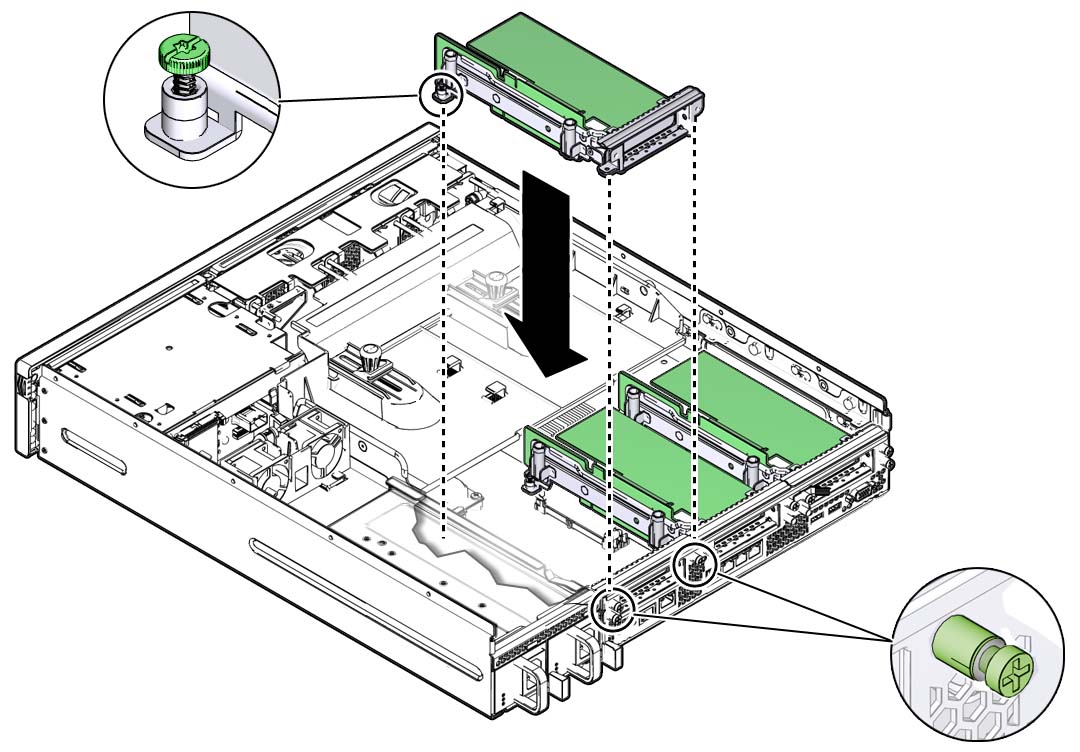
Install a PCIe2 Riser
Note - The motherboard connector for PCIe2 riser 0 is different than the connector used by PCIe2 risers 1 and 2. Do not attempt to install a PCIe2 riser in a different location on the motherboard.
- Determine into which slot you will install the PCIe2 riser.
- Retrieve the PCIe2 riser and
gently press the riser into the motherboard connector until it seats.

- Use a No. 2 Phillips screwdriver
to tighten the three green captive screws securing the PCIe riser
to the system.
One internal captive screw secures the riser to the motherboard, and two external screws secure the riser to rear panel.
- If there is a PCIe2 card installed in the riser, reconnect any external or internal cables to the card.
- Return the server to operation.