Remove the Motherboard Assembly
- Prepare the server for service.
- Follow these instructions to remove the following components and place them on an antistatic mat:
-
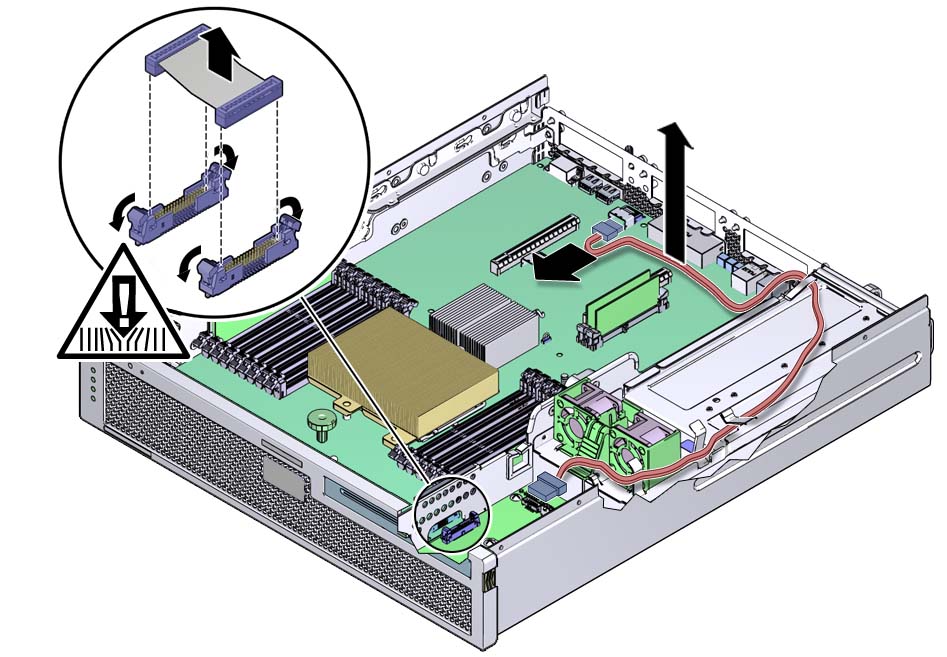
Remove the short ribbon
cable connected to the PDB.

- Disconnect the red SATA cable
connected to the media bay assembly.
If your system does not have an optical media drive, there will be one cable to detach.
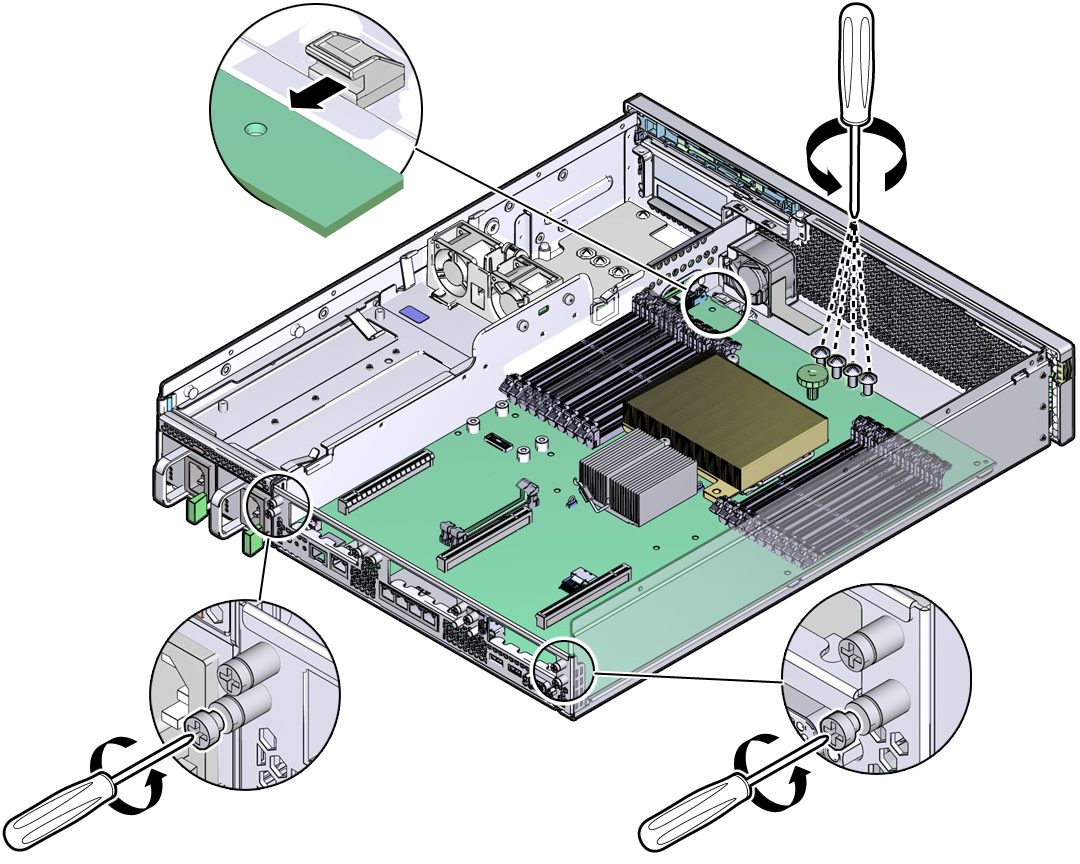
- Loosen or remove the four screws
that secure the motherboard assembly to the chassis.

- Loosen the two silver captive screws at the rear of the system.
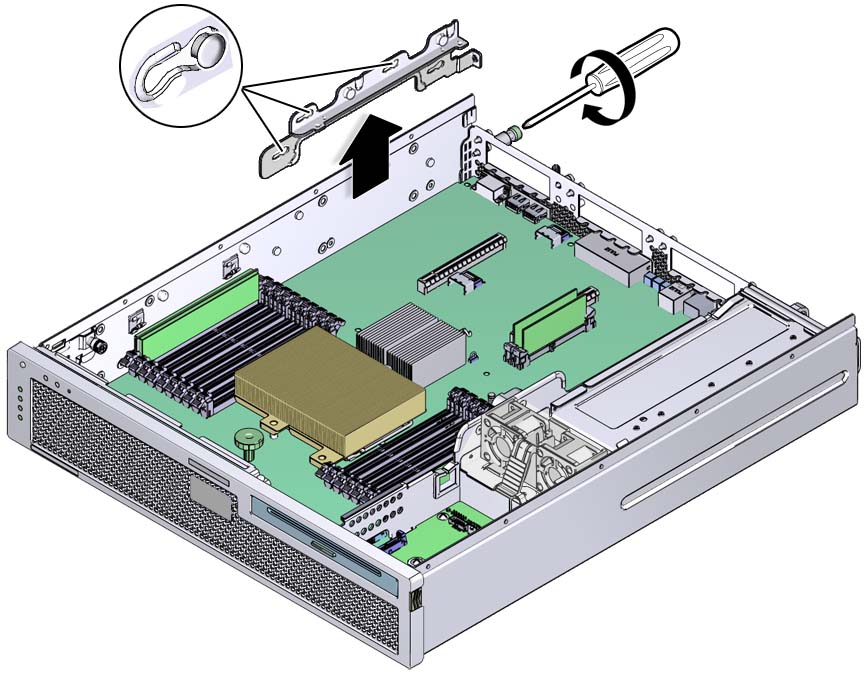
- Remove the bracket from the internal
wall of the chassis.
Slide the bracket toward the front of the chassis, and then pull it out of the chassis.

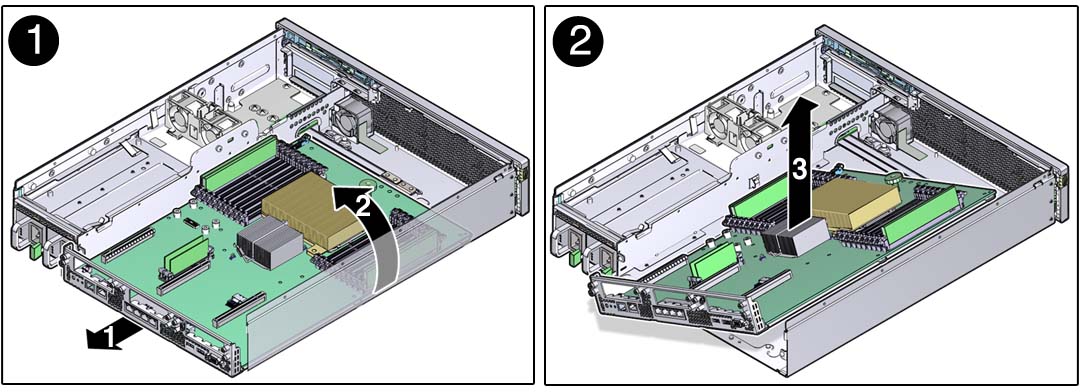
- Lift slightly and slide the motherboard assembly forward approximately one inch (25.4 mm).
- Lift up on the right edge to
approximately a 45-degree angle.

- Remove the motherboard assembly from the chassis.
- Place the motherboard assembly aside on an antistatic mat.