Remove a CPU
- Prepare the server for service.
- Remove the air duct.
See Remove the Air Duct.
- Identify which CPU to remove.
-
Identify
the location of the faulty CPU by pressing the
fault remind
button on the motherboard.
If CPU LED is off: CPU is operating properly.
If CPU LED is on (amber): CPU is faulty and should be replaced.
CPU0 is labeled P0 and closest to the power supply bay.
Figure 16 Identifying Faulty CPUs
Figure Legend
1 Fault remind button
3CPU 1 LED
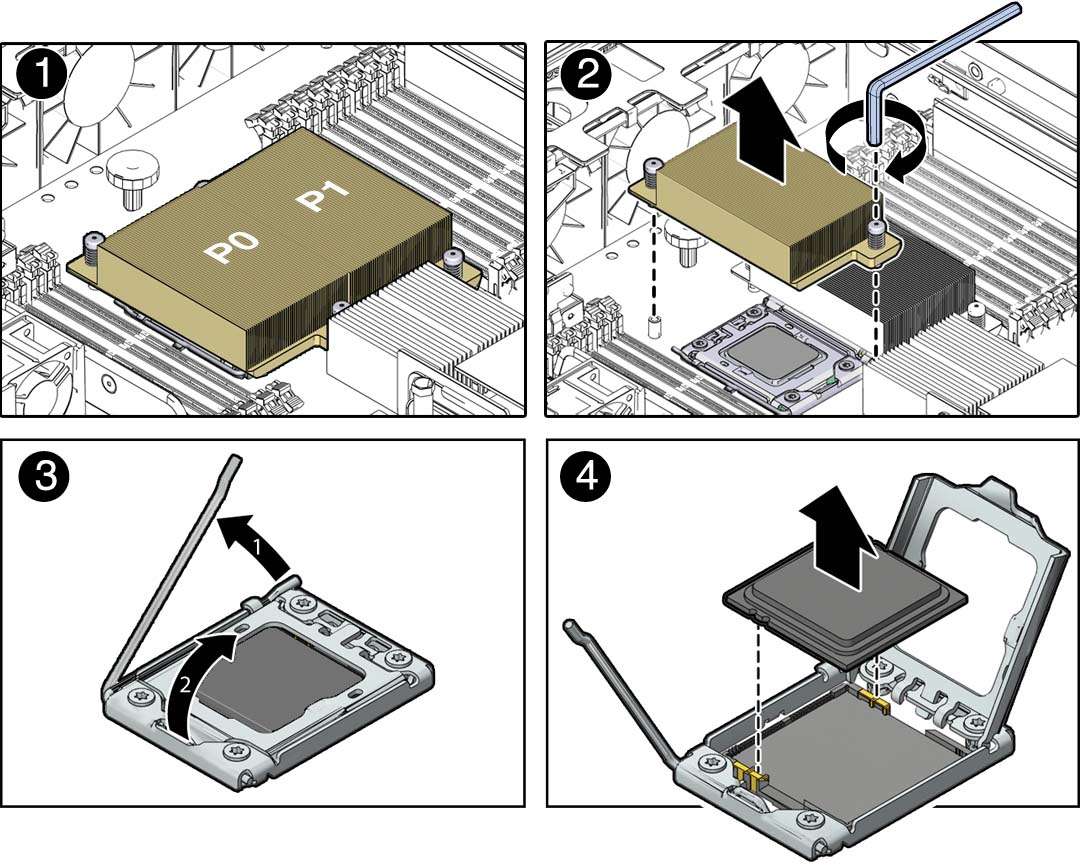
- Using an Allen wrench, unscrew
the two screws from the heatsink for the faulty CPU [2].
Turn the screws alternately one and one-half turns until they are fully removed.

- Twist the heatsink slightly to
break the grease seal, lift off the heatsink and place it upside
down on a flat surface to prevent the thermal grease from contaminating
other components.

Caution - Failure to clean the heatsink and the CPU prior to removing the CPU could result in the accidental contamination of the CPU socket or other components. Also, be careful not to get the grease on your fingers, as this could result in contamination of components.
- Use an alcohol pad to clean the
thermal grease from both the bottom of the heatsink and the top
of the CPU.
You will use this heatsink when you install a replacement CPU.
- Disengage the CPU release lever by pushing down and moving it to the side away from the CPU, and then rotating the lever upward [3].
- Open the pressure frame, carefully remove the CPU [4], and place the CPU on antistatic mat.
- If you are not replacing the CPU, install a CPU filler cover on the empty slot.