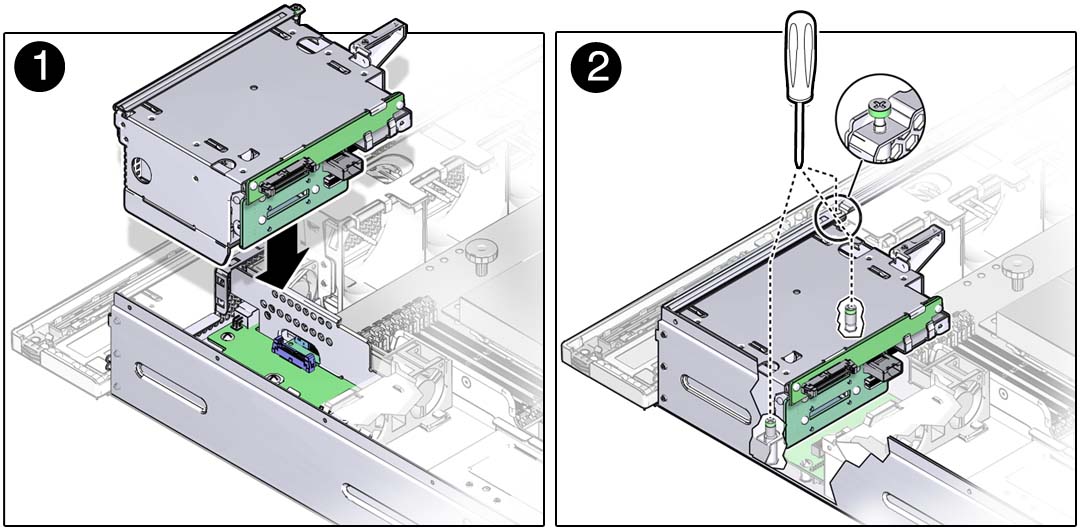
Install the Media Bay Assembly
- Remove the replacement media bay assembly from its packaging and place it on an antistatic mat.
- Move the cables as far out of the way as possible.
- Carefully lower the media bay
assembly into the chassis until it seats.
Ensure that the mylar airflow flap rests on top of the motherboard DIMMs.

- Tighten the media bay assembly screws.
- Connect the following cables
to the media bay assembly:
Figure 9 Connecting the Media Bay Assembly Cables
Figure Legend
1 SATA cable from motherboard (connected on optical media drive-equipped servers only)
2Power/signal cable from the PDB
3SAS cable from the SAS HBA
- Install the optical media drive and the drives into the same slots that you removed them.
- Consider your next step:
If you installed the media bay bracket as part of another procedure, return to that procedure.
Otherwise, continue to the next step.
- Install the air duct.
See Install the Air Duct.
- Return the server to operation.