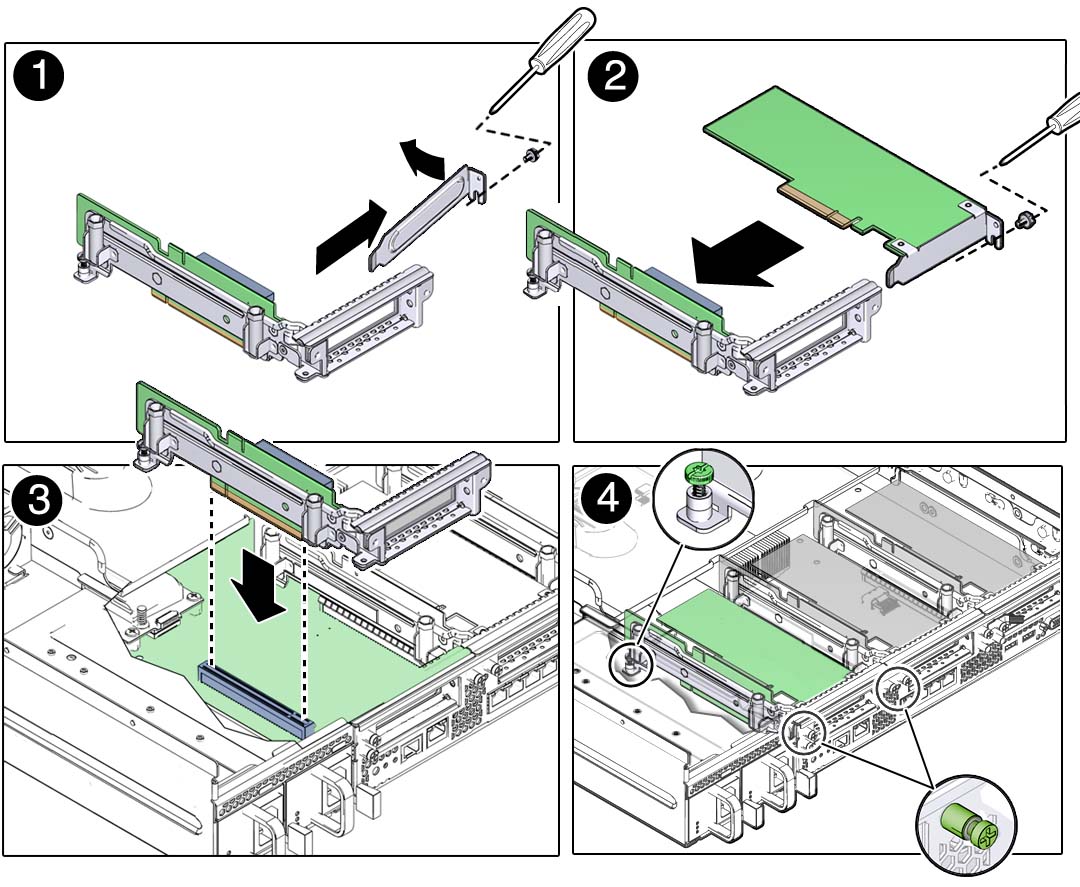
Install the Lower PCIe2 Cards
- Prepare the server for service.
- Remove the PCI mezzanine and place it on an antistatic mat.
- Remove the replacement card from its packaging and place it onto an antistatic mat.
- Remove the PCIe2 riser from the
system and place it on antistatic mat.
See Remove a PCIe2 Riser.
- If a filler panel is installed
in the riser, remove the card securing screw on the right side of
the PCIe2 card faceplate.
Save the filler panel in case you must remove the PCIe2 card for service.

- Slide the PCIe2 card into the PCIe2 riser assembly connector until fully seated.
- Install the card securing screw on the right side of the PCIe2 card faceplate.
- Seat the PCIe2 riser assembly
into the motherboard.
Note - The motherboard connector for PCIe2 riser 0 is different than the connector used by PCIe2 risers 1 and 2. Do not attempt to install a PCIe2 riser in a different location on the motherboard. - Tighten the appropriate PCIe2 riser assembly securing screws.
- Install the PCI mezzanine.
- Return the server to operation.
- Connect any external cable to
the PCIe2 card.
Refer to your PCIe2 card documentation for more information.