Install the Motherboard Assembly
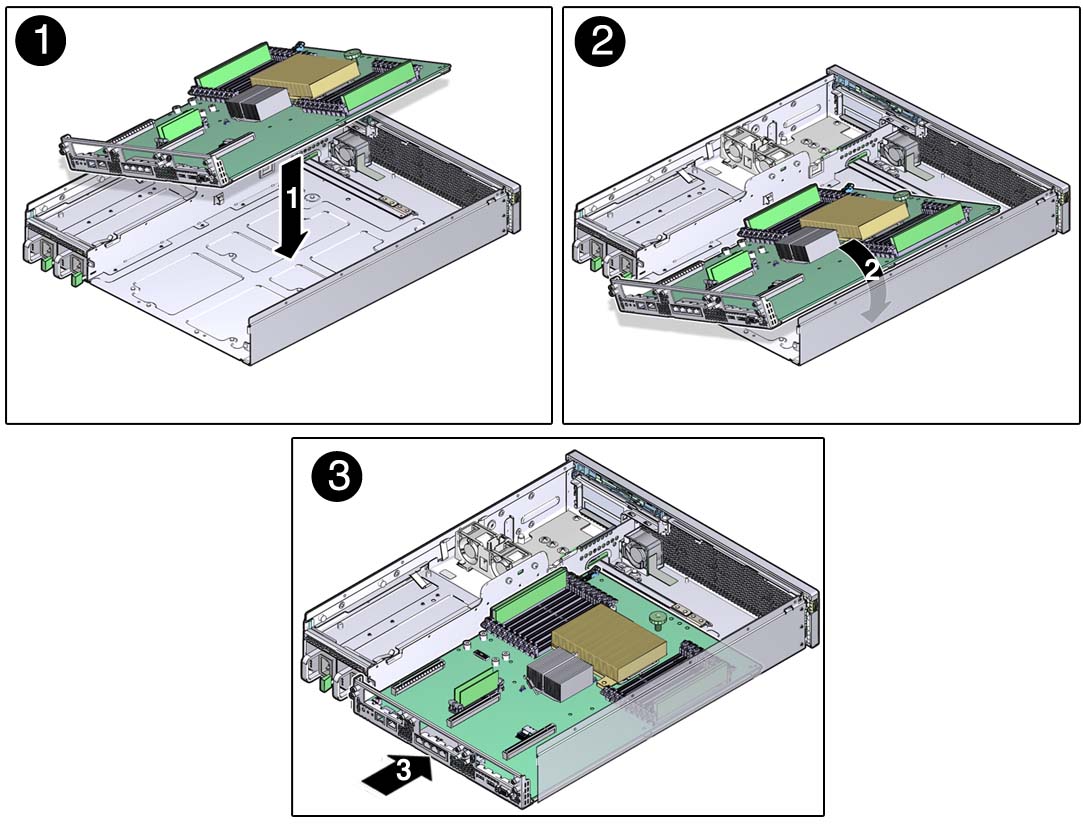
- Remove the replacement motherboard assembly from its packaging and place it on an antistatic mat.
- Lower the left edge of the motherboard
assembly into the chassis, then the entire board, and while slightly
elevated, slide the motherboard assembly to the back of the chassis.
Ensure that the motherboard slides under the guide in the front corner of the motherboard.

- Align the motherboard assembly screw holes over the chassis standoffs.
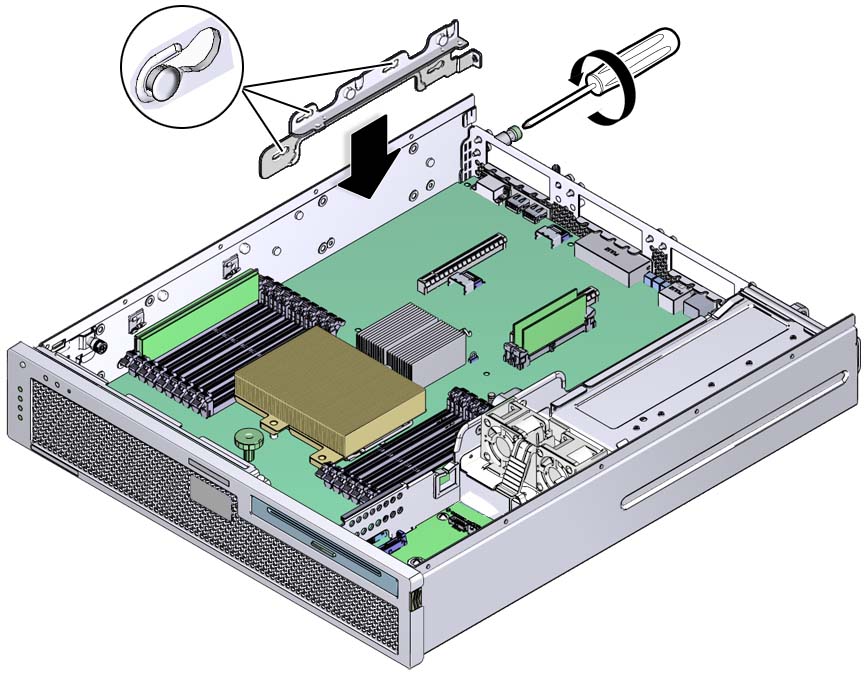
- Install the mechanical bracket
on the internal wall of the chassis.
Insert the bracket into the chassis standoffs, then push the bracket toward the rear of the server to secure it in place. You will secure this side bracket further when you tighten the rear screws in the next step.

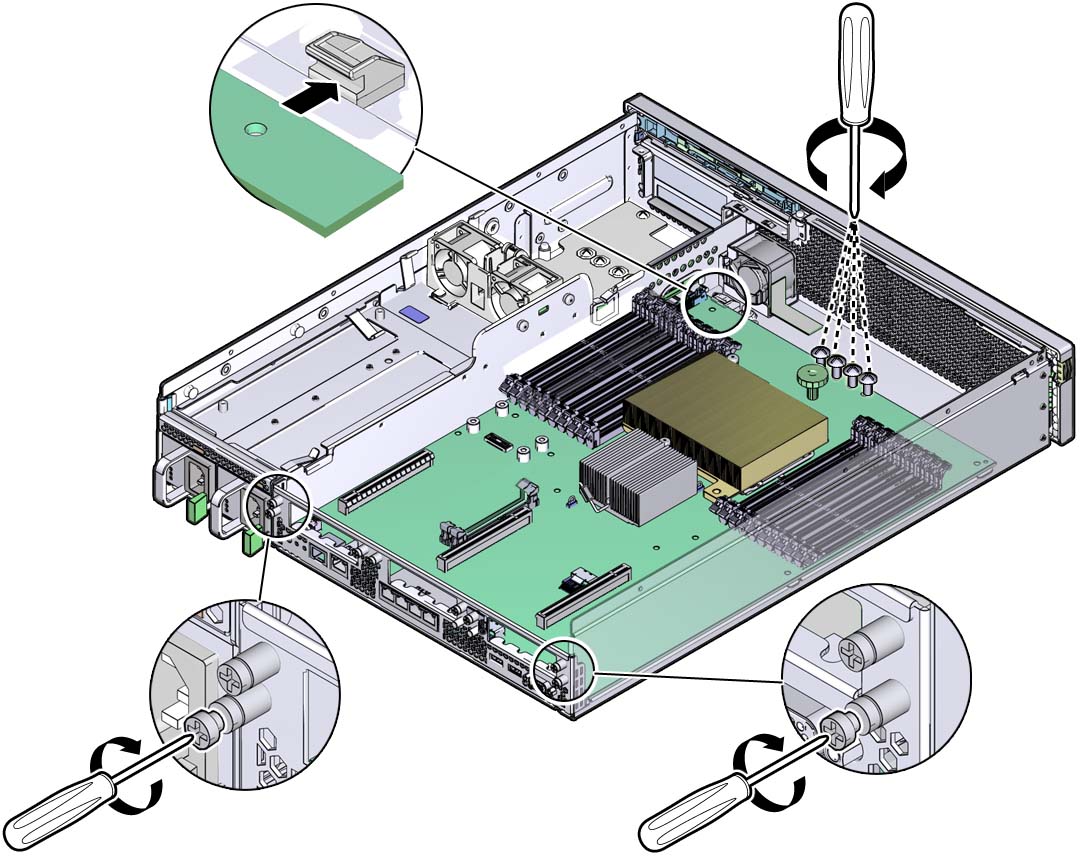
- Use a No. 2 Phillips screwdriver
to install the four motherboard assembly screws and to tighten the
two captive screws located at the rear of the server.

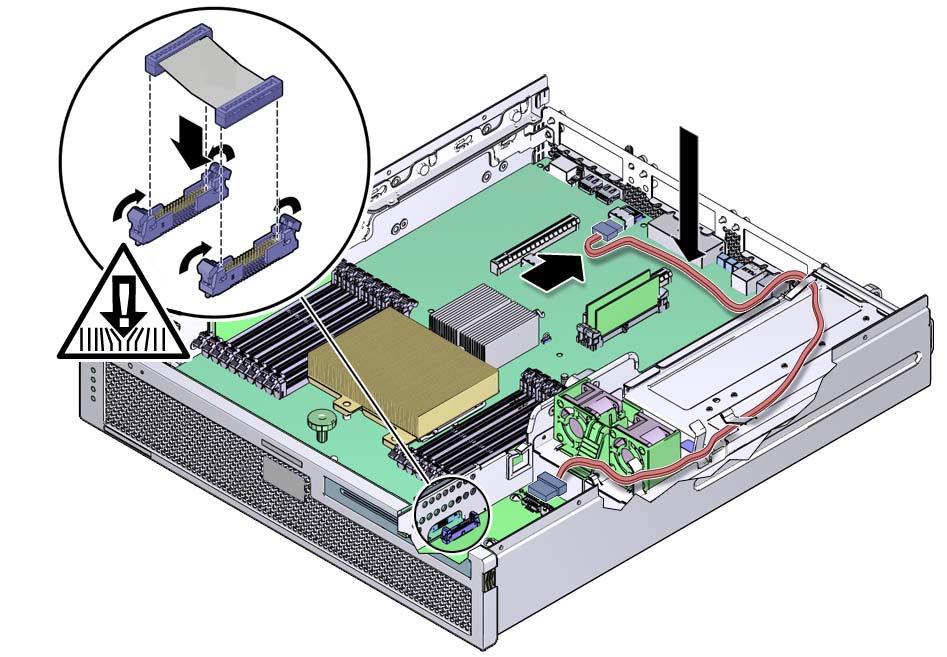
- Reconnect the PDB and SATA cables
to the following connectors on the motherboard assembly.

- Follow these instructions to install the following components:
- Return the server to operation.