Install a Second CPU
- Prepare the server for service.
- Remove the air duct.
See Remove the Air Duct.
- Remove the CPU filler cover from the empty CPU socket.
- Clean the top of the CPU with the provided alcohol wipe.
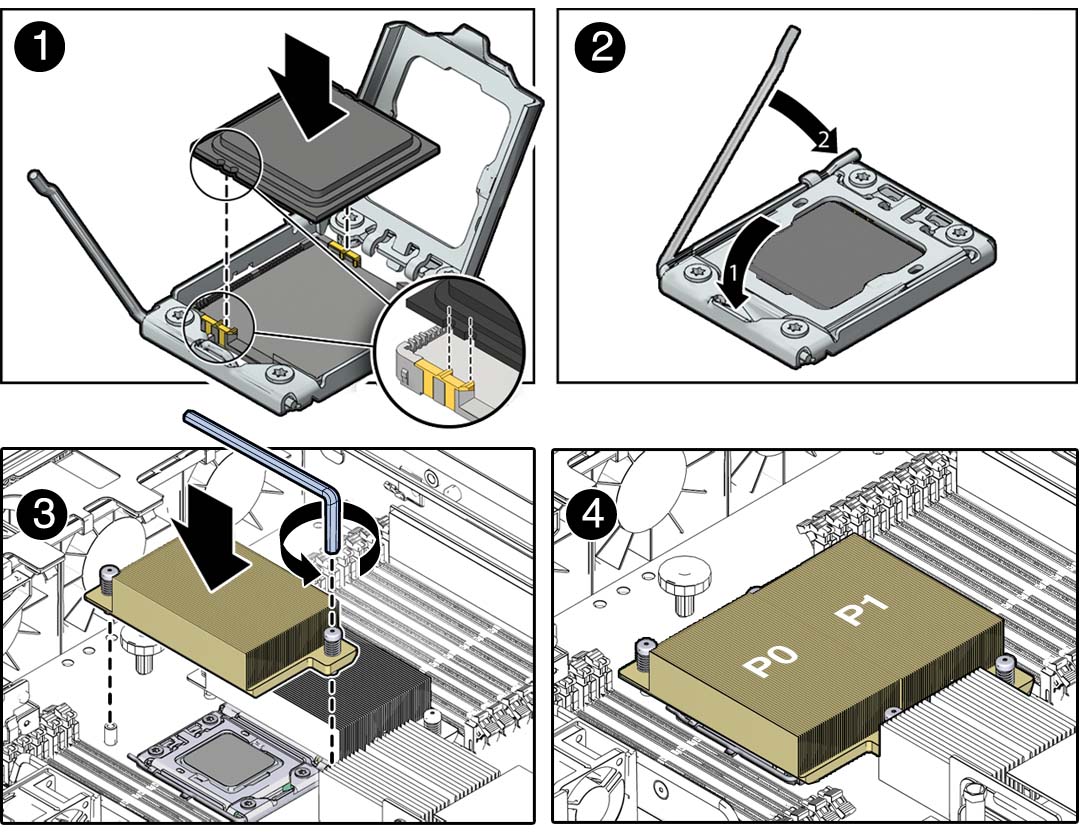
- Place the CPU in the socket with
the correct orientation.
Ensure that the orientation is correct, as damage might result if the CPU pins are not aligned correctly.

- Lower the pressure plate.
Ensure that the pressure plate sits flat around the periphery of the CPU.
- Engage the lever by rotating it downward and slipping it under the catch.
- Remove the plastic protective
cover from heatsink.
Be careful not to disturb or touch the preinstalled thermal interface material.
- Orient the heatsink so the two
screws line up with the mounting studs.
The heatsink is not symmetrical.
- Use an Allen wrench to tighten the screws alternately one half turn until fully seated.
- Replace the air duct.
See Install the Air Duct.
- Return the server to operation.