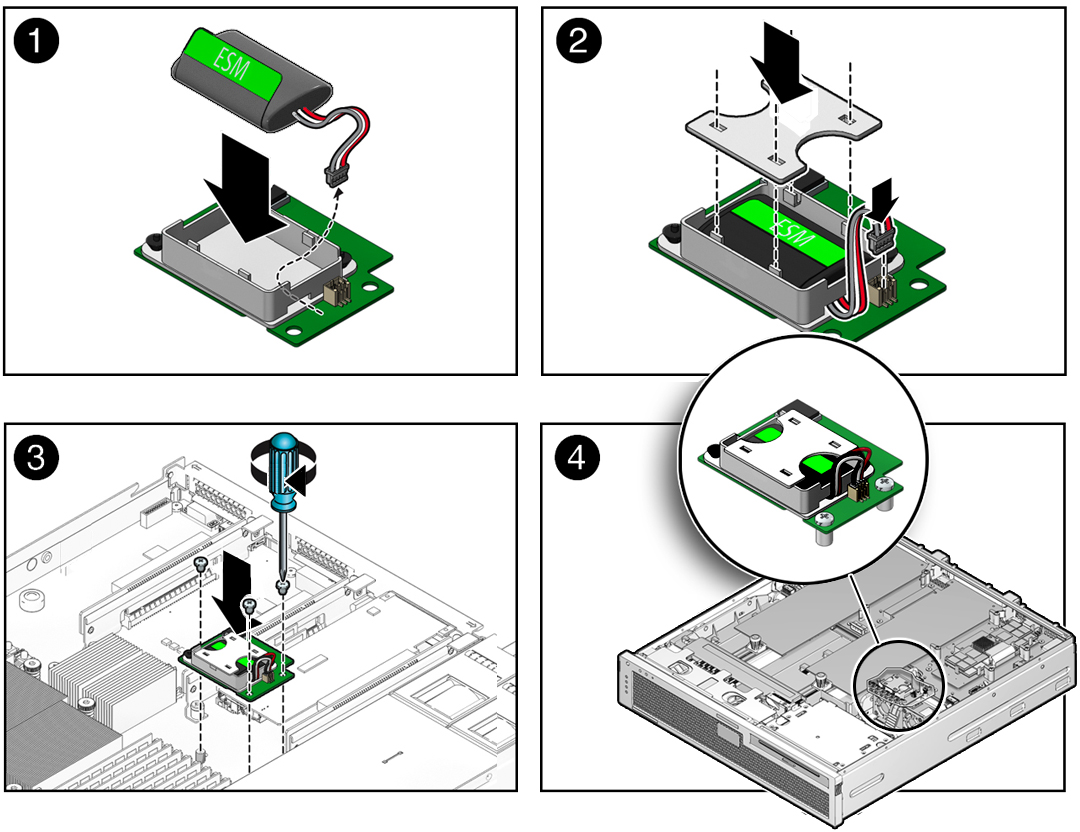
Replace the ESM
- Prepare the server for service.
- Remove the air duct and place
it on an antistatic mat.
See Remove the Air Duct.
- Remove the PCI mezzanine and place it on an antistatic mat.
- Disconnect the ESM cable from the ESM riser.
- Remove the ESM cover from the ESM riser.
- Grasp the ESM tab and lift the ESM up and out of the ESM riser.
- Unpack the replacement ESM and place it on an antistatic mat.
- Thread the ESM cable through the opening in the ESM riser.
- Place the ESM into the riser
and replace the ESM riser cover.

- Connect the ESM cable to the ESM riser.
- Install the PCI mezzanine.
- Install the air duct.
See Install the Air Duct.
- Return the server to operation.
- After replacing the faulty ESM,
clear the server fault.
Refer to the ILOM 3.0 documentation for more information about the following steps.
- Use the ILOM CLI to
log in to the server as root and type the following command
to list all known faults on the server:
-> show /SP/faultmgmt
The command lists all known faults, for example:
-> show /SP/faultmgmt
  Targets:
     0 (/SYS/ESMR/ESM)
  Properties:
  Commands:
      cd
      show
- Type the following command to
clear the fault.
-> set /SYS/ESMR/ESM clear_fault_action=true
For example:
-> set /SYS/ESM clear_fault_action=true
Are you sure you want to clear /SYS/ESMR/ESM (y/n)? y
Set ???clear_fault_action” to ???true???
- Use the ILOM CLI to
log in to the server as root and type the following command
to list all known faults on the server: